By the HMNDP Editorial Team, independent reporting on lawn care, landscaping, and the green-industry business.
Last reviewed: June 2026
What hardscape installation is and what it includes
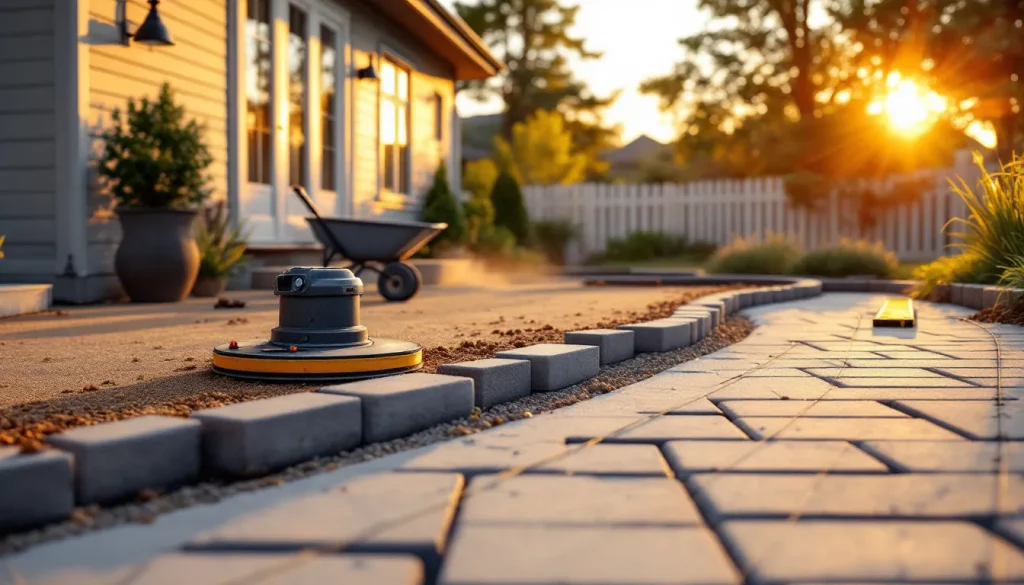
Hardscape installation is the process of building the non-living, hard-surface features of a landscape: patios, walkways, retaining walls, paver driveways, steps, and decorative stone. It covers everything from the first site evaluation and design through excavation, base preparation, laying the surface material, and locking it in place with edge restraints and joint sand.
Hardscape is the built half of a yard. Softscape is the living half: grass, shrubs, trees, mulch, and flower beds. A finished landscape usually blends both, but they fail for different reasons and follow different rules. Hardscape lives or dies on what sits underneath it, not on what you see.
The visible paver or stone is maybe 20 percent of the work. The other 80 percent is grading, drainage, excavation, and compacted base, the parts a homeowner never sees and a bad contractor cuts. For related surface projects, see our guides on artificial grass installation and hardscaping.
Common hardscape elements
The most common hardscape elements are paver patios, walkways, retaining walls, driveways, steps, and decorative stone or gravel features. Each shares the same base-and-drainage logic but differs in load, height, and how much engineering it needs. A patio carries foot traffic; a driveway carries vehicle loads; a retaining wall holds back soil.
| Element | Typical use | Main risk if built wrong |
|---|---|---|
| Paver patio | Seating, dining areas | Settling, ponding water |
| Walkway | Path to door or garden | Tripping edges, heaving |
| Retaining wall | Holding back a slope | Bulging, collapse |
| Paver driveway | Vehicle parking | Rutting under load |
| Decorative stone | Beds, drainage, accent | Weed growth, migration |
The hardscape installation process, step by step
The hardscape installation process runs in a fixed sequence: consultation and site evaluation, design and layout, material selection, excavation, base preparation and compaction, bedding sand, laying the surface, edge restraints, and joint sand. Skipping or shortcutting any base or drainage step is the most common cause of premature failure.
- Consultation and site evaluation. A contractor or DIYer assesses grade, soil type, drainage patterns, and utility lines (call 811 before digging). This step sets slope direction and whether the site needs extra drainage.
- Design and layout. Fix dimensions, elevations, and pattern. Mark the footprint with paint or stakes and string, including the drainage slope.
- Material selection. Choose pavers, natural stone, or concrete based on budget, load, and climate.
- Excavation. Dig out to total depth: surface thickness plus base plus bedding. For a patio that is often 7 to 12 inches.
- Base preparation. Add and compact crushed aggregate in lifts.
- Bedding sand. Screed a 1 inch layer of coarse sand.
- Laying the surface. Set pavers or stone tight, following the pattern.
- Edge restraints and joint sand. Lock the perimeter and sweep sand into joints.
Initial consultation and site evaluation
The consultation and site evaluation is the first step and the one that prevents the most expensive mistakes. It identifies soil type, existing drainage, slope direction, and buried utilities before any digging starts. Clay soils drain poorly and heave more; sandy soils drain fast but shift. The evaluation decides base depth and whether a drain is needed.
Design and layout planning
Design and layout planning fixes the size, shape, elevation, and pattern of the hardscape before excavation. This phase also sets the drainage slope, the single spec most homeowners never hear about. Lay out the footprint with stakes and string, then confirm water will flow away from the house at every point along the surface.
Material selection: pavers, natural stone, or concrete
Material selection comes down to three main choices: concrete pavers, natural stone, and poured or stamped concrete. Concrete pavers are the most popular for cost, durability, and repairability. Natural stone (flagstone, bluestone, travertine) costs more and looks premium. Poured concrete is cheapest per square foot but cracks and is hard to repair.
| Material | Typical installed cost/sq ft | Lifespan | Repairability |
|---|---|---|---|
| Concrete pavers | $15 to $30 | 25 to 50 years | High (swap single unit) |
| Natural stone | $25 to $50+ | 50+ years | Moderate |
| Poured/stamped concrete | $10 to $22 | 20 to 30 years | Low (crack repair visible) |
| Gravel/decorative stone | $5 to $12 | Ongoing top-ups | High |
Ranges reflect 2025 to 2026 national averages and shift with region, access, and site conditions. Get itemized quotes rather than a single lump sum.
Site preparation, excavation, and base: the specs competitors skip
Site preparation and base work is the make-or-break stage, and it runs on hard numbers. For pedestrian paver patios and walkways, excavate and install 4 to 6 inches of compacted crushed aggregate base, then 1 inch of coarse bedding sand. Driveways carrying vehicles need 8 to 12 inches of base. These depths are the load-bearing details most articles leave out.
Base preparation and compaction
Base preparation means adding crushed stone (often called dense-grade aggregate, road base, or Class II) and compacting it in thin layers. Compact in lifts of 2 to 3 inches at a time with a plate compactor, not all at once. A base compacted in one thick pass stays loose underneath and settles later. Aim for full plate-compactor coverage on each lift.
Numbers to build to: 4 to 6 inches compacted base for patios and walkways, 8 to 12 inches for driveways, and 1 inch of screeded bedding sand on top. Add 2 to 4 inches of base in poor-draining clay soils.
Drainage and slope
Every hardscape must shed water. Build in a slope of 1 to 2 percent, which is about 1/4 inch of drop per foot, running away from any structure. A 12 foot patio should sit roughly 3 inches lower at the far edge than at the house. Flat or reverse-sloped hardscape ponds water, and standing water is what freezes, heaves, and destroys the surface.
Installing pavers, decorative stone, and edge restraints
Installation means setting the surface material on the screeded bedding sand, then locking it in place. Lay pavers or stone tight against each other in the chosen pattern, working off the sand without walking on it. Once set, install rigid edge restraints around the entire perimeter, then sweep polymeric joint sand into the gaps and compact.
Two specs prevent the most common failures. Use polymeric joint sand, which hardens when wet to block weeds and ants, not plain sand. Install edge restraints (plastic, aluminum, or concrete) on every open edge; without them, pavers spread outward and the field opens up within a year or two.
Retaining wall construction basics
Retaining wall construction holds back soil and carries far more load than a flat surface, so it follows stricter rules. A basic segmental block wall needs a compacted gravel base, a buried first course (about 10 percent of wall height below grade), gravel backfill for drainage, and a perforated drain pipe behind the base. Poor drainage behind a wall is the top cause of bulging and collapse.
Height is the dividing line. Walls under 3 to 4 feet are often DIY-feasible with segmental block. Walls above roughly 4 feet, or any wall holding a slope, driveway, or structure, typically require engineering and often a permit. Check local code; many jurisdictions require a licensed engineer above 3 to 4 feet.
Where to start as a DIY beginner
The safest DIY starting project is a simple paver walkway or small ground-level patio on well-draining soil. It teaches the full sequence (excavate, base, compact, screed sand, lay, edge, joint sand) at low stakes. Start small, rent a plate compactor, and follow a reputable step-by-step video from a manufacturer like Belgard, Techo-Bloc, or Pavestone before you dig.
- Watch a manufacturer install video start to finish before buying materials.
- Call 811 to mark utilities, then lay out the footprint with a 1 to 2 percent slope.
- Excavate deep enough for 4 to 6 inches of base plus 1 inch sand plus paver thickness.
- Rent a plate compactor. Compact the base in 2 to 3 inch lifts.
- Screed sand, lay pavers, install edge restraint, sweep in polymeric sand, compact again.
DIY vs hiring a contractor: an honest framework
The DIY-versus-pro decision should follow the project, not the price tag. Simple, flat, well-draining projects are DIY-safe. Anything involving significant load, height, water problems, or your home’s foundation belongs to a pro. Retaining walls over 3 to 4 feet, poor-drainage lots, and hardscape near a foundation are the clearest hire-a-pro triggers.
| Project | Verdict | Why |
|---|---|---|
| Simple paver walkway | DIY-safe | Low load, easy to fix |
| Small ground-level patio, good drainage | DIY-safe | Forgiving, no engineering |
| Large patio or paver driveway | Lean pro | Compaction and load specs are unforgiving |
| Retaining wall over 3 to 4 ft | Hire a pro | Structural, often needs a permit/engineer |
| Poor-drainage or clay-heavy site | Hire a pro | Drainage design prevents heaving |
| Hardscape near the foundation | Hire a pro | Wrong slope routes water into the house |
If you hire, vet carefully. Our hardscape contractor vetting guide covers the base-depth and drainage questions that separate installers who build to spec from those who cut corners. Homeowners weighing low-maintenance surfaces can also compare artificial turf installation.
Why hardscapes fail, and how to prevent it
Hardscapes fail for three preventable reasons: a thin or poorly compacted base, missing drainage and slope, and no edge restraint or polymeric joint sand. The result is heaving, settling, ponding, and weeds. Nearly every failure traces back to the invisible base-and-drainage work, not the pavers themselves. Build the base right and the surface lasts decades.
- Heaving: water freezes under a flat or shallow-base surface and lifts it. Prevent with 1 to 2 percent slope and full base depth.
- Settling: base compacted in one thick pass sinks unevenly. Prevent by compacting in 2 to 3 inch lifts.
- Weeds and ants: plain joint sand lets growth through. Prevent with polymeric sand.
- Spreading pavers: no edge restraint lets the field creep. Prevent with rigid restraints on every open edge.
Frequently Asked Questions
What is hardscape installation and what does it include?
Hardscape installation is the process of building the hard, non-living features of a landscape, including patios, walkways, retaining walls, paver driveways, and steps. It includes site evaluation, design, material selection, excavation, base preparation and compaction, bedding sand, laying pavers or stone, edge restraints, and joint sand. The unseen base and drainage work is roughly 80 percent of the job.
What are the steps in the hardscape installation process?
The steps are consultation and site evaluation, design and layout, material selection, excavation, base preparation with compaction, screeding bedding sand, laying the surface material, installing edge restraints, and sweeping in polymeric joint sand. The sequence is fixed. Excavation must reach full depth for base plus sand plus surface, and base must be compacted in thin lifts before any pavers are set.
How much does hardscape installation cost per square foot?
Installed hardscape typically runs $15 to $30 per square foot for concrete pavers, $25 to $50 or more for natural stone, and $10 to $22 for poured or stamped concrete, based on 2025 to 2026 national averages. Cost drivers include material, labor, site access, excavation depth, and drainage needs. Poor-draining or sloped sites raise cost. Always request itemized quotes.
How deep should the base be for pavers or a patio?
For pedestrian paver patios and walkways, install 4 to 6 inches of compacted crushed aggregate base plus 1 inch of coarse bedding sand. Driveways carrying vehicles need 8 to 12 inches of base. Add 2 to 4 inches in clay or poor-draining soil. Compact the base in 2 to 3 inch lifts with a plate compactor, never in one thick pass.
Can I install hardscaping myself or should I hire a contractor?
A simple paver walkway or small ground-level patio on well-draining soil is DIY-safe if you rent a plate compactor and follow the base and slope specs. Hire a professional for retaining walls over 3 to 4 feet, poor-drainage or clay-heavy sites, paver driveways, and any hardscape near your foundation, where wrong slope or compaction causes structural or water damage.
How long does a hardscape installation project take?
A small paver walkway can take a DIY weekend. A professional patio of 200 to 400 square feet usually takes 3 to 7 working days, depending on excavation, drainage work, and weather. Retaining walls and multi-feature projects run 1 to 3 weeks or longer. Poor site access, heavy clay soil, and added drainage all extend the timeline.
What is the difference between hardscaping and landscaping (softscape)?
Hardscaping is the built, non-living part of a yard: patios, walkways, walls, and stone. Softscape (the landscaping most people picture) is the living part: grass, plants, shrubs, trees, and mulch. Hardscape depends on base and drainage to last; softscape depends on soil, water, and sunlight. Most finished yards combine both, but they are designed and maintained differently.
Why do hardscapes fail, and how do you prevent settling and weeds?
Hardscapes fail mainly from a thin or poorly compacted base, missing slope and drainage, and no edge restraint or joint sand. This causes heaving, settling, ponding, and weeds. Prevent it by building a full 4 to 6 inch base compacted in 2 to 3 inch lifts, sloping 1 to 2 percent away from structures, installing rigid edge restraints, and using polymeric joint sand.