
By the HMNDP Editorial Team | Last reviewed: June 2026
Fence stain: what it is and how to choose the right one
Fence stain is a penetrating exterior wood coating that colors and protects fence boards while letting some or all of the grain show through. The right pick depends on three things: how old the wood is, its current condition, and whether it already carries a coating. New smooth cedar takes transparent or semi-transparent stain best; gray, weathered, or previously painted wood usually needs semi-solid or solid.
Stain differs from paint by soaking into the wood rather than forming a surface film. That means it will not peel or crack the way paint does, and reapplication is a wash-and-recoat job instead of a scrape-and-sand job.
Most fence stains sold at Home Depot, Lowe’s, and paint stores fall into the broader exterior wood stain category, which also covers deck and siding stains. A product labeled for decks works fine on a fence, but a fence-specific formula is often thinner and easier to spray across large vertical runs.
If you are still deciding between wood and a lower-maintenance material, our overviews of vinyl fencing and wrought iron fence panels lay out the trade-offs before you commit to a staining schedule.
Fence stain types by opacity: transparent to solid
Fence stain comes in four opacity grades, from transparent (most grain shows, least protection) to solid (no grain, most protection). Opacity tracks pigment load: more pigment blocks more ultraviolet light and hides more flaws, but shows less wood. As a rule, the older or more weathered the fence, the more pigment you want.
| Opacity grade | Grain visible | UV / fade protection | Typical lifespan | Best for |
|---|---|---|---|---|
| Transparent (clear/toner) | Full | Low | 1-2 years | New, high-grade cedar or redwood you want to show off |
| Semi-transparent | Most | Moderate | 2-4 years | New to lightly weathered cedar and pine, most common DIY pick |
| Semi-solid | Some (grain texture only) | High | 3-5 years | Weathered wood, minor gray or blemishes to mask |
| Solid (opaque) | None (grain texture only) | Highest | 4-7 years | Old, gray, or previously painted/solid-stained fences |
Solid stain behaves closest to paint and is the only opacity that reliably covers a fence already coated with solid stain or paint. Going from solid back to transparent is not possible without stripping or sanding the film off first.
Which opacity should you choose (decision framework)
Match opacity to the wood’s age, condition, and existing coating. Use the table below as a starting rule, then bump one grade more solid if the fence gets direct all-day sun, since UV fades lighter stains fastest. This framework is the piece retail SKU lists and single-brand pages leave out.
| Your fence right now | Recommended opacity | Why |
|---|---|---|
| New cedar/redwood, tight grain, under 1 year | Transparent or semi-transparent | Wood looks good; you mainly need UV and water protection |
| New pine or pressure-treated (once dry) | Semi-transparent | Pigment adds UV defense pine lacks naturally |
| 2-8 years, some graying, sound boards | Semi-solid | Enough pigment to even out color without hiding all grain |
| Old, heavily gray, cracked, or blotchy | Solid | Masks damage and gives the longest recoat window |
| Previously painted or solid-stained | Solid only | Transparent grades cannot cover an existing film |
Fence stain colors and how to pick one
Fence stain colors run from clear naturals (cedar tone, honey, natural) through browns (chestnut, mahogany, walnut) to grays and near-blacks. Two rules save regret: lighter and more transparent colors show wood grain but fade faster, and any color reads two to three shades darker on rough, thirsty fence wood than on the store chip.
Test before you buy a full batch. Brush a sample onto a hidden board or an offcut, let it dry a full day, and check it in daylight. Stain color shifts as it dries and again once a second coat goes on.
Darker colors (walnut, black, dark gray) hold color longest because more pigment blocks more UV, but they also absorb heat, which can matter on a south-facing privacy fence that already runs hot in summer. Coordinate the color with any fence gates so the whole run reads as one piece.
How to prep a fence before staining (the step that decides everything)
Prep is the single biggest cause of stain failure, and almost no retail page sequences it. The goal: a clean, dry, mildew-free surface with open wood pores. Skipping cleaning or staining wet wood traps moisture, and the finish flakes within a season. Budget one full day for prep and drying before you open a can.
- Clear and protect. Move plants, tie back shrubs, and lay drop cloths on grass and pavers below the fence.
- Wash the wood. Use a fence or deck cleaner (oxygenated cleaner, sodium percarbonate based) with a stiff brush or a pressure washer set to a wide fan at 500-800 PSI held 12+ inches back. Higher pressure or a close nozzle gouges soft wood.
- Kill mildew and remove graying. Black speckling is mildew; treat it with a mildewcide or a diluted cleaner made for it. Silver-gray surface wood is dead, UV-damaged fiber that stain cannot bond to well, so a brightener (oxalic acid based) restores fresh wood tone and etches the surface for grip.
- Scrape and sand failing coatings. On previously stained or painted boards, remove anything loose or peeling. Feather sand the edges so recoated areas blend.
- Let it dry, then test moisture. Wait for 24-48 hours of dry weather. Confirm readiness with a moisture meter (see below) rather than guessing.
New vs weathered vs previously stained wood
Each starting condition needs a different prep path. New wood needs a light clean and often a short weathering wait; weathered wood needs brightening; previously coated wood needs the old finish assessed and matched or stripped. Getting this wrong is why identical stains last five years on one fence and one on another.
- New, smooth, kiln-dried cedar/pine: Rinse off mill glaze and dirt, let dry, stain. Very smooth boards may repel stain, so a light scuff sand or a cleaner opens the pores.
- Weathered/gray wood: Clean, then apply a wood brightener to strip the gray and reopen pores. Do not stain over silvered wood; adhesion is poor.
- Previously stained/painted: Identify the old coating. Recoat with the same or a more opaque product, or strip fully if you want to switch to transparent. Solid over solid is the reliable path.
Moisture-meter test and the weather window
Wood should read at or below 15% moisture on a pin-type meter before staining, and many labels want 12-15%. Too wet and the stain cannot penetrate; it sits on top and fails. No meter? Sprinkle water on the boards: if it soaks in within seconds, the wood is dry and thirsty; if it beads, wait.
Stain in a dry weather window: no rain for 24-48 hours before and after, air temperature roughly 50-90°F (check the label), out of direct hot sun, and low humidity. Hot sun flashes the surface and blocks penetration. Early morning or an overcast day is ideal.
How to stain a wood fence: step-by-step application
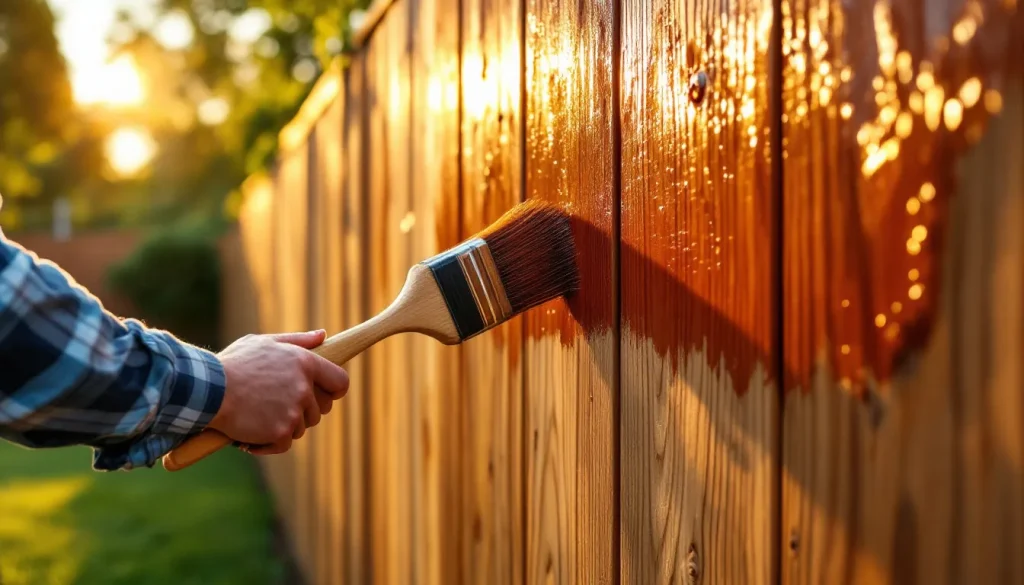
Apply fence stain to clean, dry wood, one section at a time, working with the grain and keeping a wet edge to avoid lap marks. Back-brush whatever you spray or roll so the stain is pushed into the wood, not left sitting on top. Follow the label for coats and dry time; those numbers override any general advice here.
- Stir, never shake. Stir the can thoroughly and re-stir often; pigment settles. If using more than one can, mix them together (box them) so color stays consistent across the fence.
- Work top to bottom, one board or section at a time. Complete full boards before stopping so lap marks do not form where wet meets dry.
- Apply along the grain. Load evenly, spread thin, and coat every edge, end grain, and post. End grain drinks stain and is where rot starts.
- Back-brush. After spraying or rolling, drag a brush over the wet stain to work it into the grain and even out the film.
- Wipe excess. With transparent and semi-transparent stains, wipe any stain still sitting on the surface after 10-15 minutes so it does not get tacky or shiny.
- Let it dry, then decide on a second coat. Respect the label dry time (often 4-24 hours between coats). Add a second coat only if the label allows and the wood still looks thirsty.
Application tools: brush, roller, or sprayer
Brush gives the best penetration and control, sprayer is fastest for large fences, and roller sits in between but needs back-brushing. Most homeowners get the best result spraying or rolling to lay stain on fast, then back-brushing to work it in. Match the tool to fence size and your patience.
| Tool | Speed | Penetration | Best for | Watch out for |
|---|---|---|---|---|
| Brush (stain/nylon-poly) | Slow | Best | Small fences, detail, back-brushing | Time and fatigue on long runs |
| Roller (3/8 in nap) | Medium | Moderate | Flat, wide boards | Misses grooves; must back-brush |
| Airless/pump sprayer | Fast | Low on its own | Large fences, pickets, lattice | Overspray; always back-brush |
How many coats and how much stain per gallon
Most fences need one to two coats, and a gallon of fence stain typically covers 150-300 square feet on smooth wood or as little as 100-150 on rough or thirsty wood. Always read the label coverage; opacity and wood texture swing it widely. Rough-sawn and weathered boards drink far more than smooth cedar.
To estimate: measure fence length times height for one side, double it for both sides, and add posts. Divide total square footage by the label’s low coverage number to be safe, then buy one extra gallon so you can box cans for color consistency.
Sealing vs staining: do stain-and-sealer combos do both?
Staining adds color plus UV protection; sealing adds water repellency. Many modern fence products are stain-and-sealer combos (labeled “stain and sealer” or “stain plus waterproofer”) that do both in one coat, so most homeowners do not need a separate clear sealer on top. Read the label to confirm your product waterproofs.
Use a separate clear sealer only when you applied a bare toner or a transparent stain that does not claim water repellency, or when you want extra protection on end grain and the fence base. Do not put a film-forming clear sealer over a solid stain that already waterproofs; it can trap moisture.
Bottom line: check whether your can says it seals. If it does, one product handles color, UV, and water. If it only colors, add a compatible clear water repellent from the same brand.
Oil-based vs water-based fence stain
Oil-based stain penetrates deeper and enriches grain but dries slowly, smells strong, and carries higher VOCs; water-based (acrylic/latex) stain dries fast, cleans up with soap and water, resists mildew, and holds color longer without going as deep. For most DIY fences today, a quality water-based or hybrid stain is the practical pick.
| Factor | Oil-based | Water-based (acrylic) |
|---|---|---|
| Penetration | Deep, rich grain | Shallower, more surface film |
| Dry time | Slow (hours to a day) | Fast (1-4 hours) |
| Cleanup | Mineral spirits | Soap and water |
| VOCs / odor | Higher | Lower, low-VOC options common |
| Color retention | Good, can darken/mildew over time | Excellent, mildew-resistant |
| Recoat ease | Easy (wash and recoat) | Easy (wash and recoat) |
VOC (volatile organic compound) rules matter here. Several states, including California and much of the Northeast (OTC region), cap stain VOC content, which limits which oil-based products you can buy locally. Low-VOC and water-based formulas are widely stocked to meet those limits and are better for staining near gardens, pets, and enclosed yards.
Best fence stain: brand comparison (Behr, Home Depot, and others)
The best fence stain is the one matched to your wood and climate, but on a neutral cost and coverage basis, Behr and Home Depot’s private brands lead on value while Ready Seal and TWP lead on ease and pro results. Prices below are typical 2026 US retail per gallon and shift by region and sale.
| Product | Base | Opacities | Coverage (sq ft/gal) | Typical price/gal | Notes |
|---|---|---|---|---|---|
| Behr Premium Semi-Transparent | Water/oil hybrid | Transparent to solid | 150-250 | ~$40-50 | Wide color range, sold at Home Depot, strong value |
| BEHR Premium Solid Color Stain | Water | Solid | 200-400 | ~$40-50 | Best for old/gray fences and recoats |
| Glidden / Home Depot house lines | Water | Semi-transparent, solid | 150-300 | ~$30-45 | Budget option, fewer specialty colors |
| Ready Seal | Oil | Semi-transparent | 100-175 | ~$45-55 | No lap marks, no back-brush needed, forgiving for first-timers |
| TWP 1500 Series | Oil | Semi-transparent | 200-350 | ~$45-60 | Pro favorite, strong durability, VOC-compliant versions vary by state |
| Thompson’s WaterSeal (stain & sealer) | Water | Transparent to solid | 150-400 | ~$25-40 | Cheapest, better as a sealer than a color coat |
Cost per square foot matters more than sticker price. A $45 gallon covering 300 square feet (about $0.15/sq ft) beats a $30 gallon covering 150 ($0.20/sq ft). For a first-timer worried about lap marks, Ready Seal’s no-back-brush behavior is worth the slightly higher per-foot cost.
Wood species: cedar, pine, and pressure-treated
Cedar and redwood accept stain readily and look best under transparent grades; pine and spruce are thirstier and benefit from more pigment; pressure-treated lumber stains fine but only after it dries out, which can take weeks to months. Species changes both the stain you pick and how long you wait.
- Cedar / redwood: Naturally rot-resistant with tight grain. Takes transparent and semi-transparent beautifully. Very smooth mill surfaces may need a light clean to accept stain.
- Pine / spruce / fir: Softer and more absorbent, and prone to graying without pigment. Semi-transparent or semi-solid gives better UV defense.
- Pressure-treated: Common for posts and value fences. Comes wet with preservative and must dry before staining (see below).
How long to let pressure-treated wood dry before staining
Pressure-treated lumber must dry before it will accept stain, and that ranges from a few weeks to several months depending on how wet it was milled (kiln-dried-after-treatment KDAT is faster). Do not go by a calendar alone. Test the wood, not the date. Staining PT wood too soon is a top cause of finish failure that no top result flags.
Two field tests confirm readiness:
- Water-bead test: Sprinkle water on the board. If it soaks in within a minute, the wood is dry enough. If it beads and sits, wait longer.
- Moisture meter: Aim for 15% or below. New PT fence lumber often reads well above 20% for the first several weeks after installation.
KDAT (kiln-dried after treatment) boards can be ready in one to two weeks; standard wet-treated stock often needs one to three months of dry weather. When in doubt, wait; a slightly overdry board still takes stain, an overwet one rejects it.
Durability and reapplication window
Fence stain lasts one to seven years depending on opacity, base, sun exposure, and prep quality, with the common 3-5 year claim applying to semi-solid and solid grades on well-prepped wood. Transparent stains fade in one to two years. Recoating on schedule is a wash-and-recoat job, far easier than a full strip.
Signs it is time to recoat: color has faded or grayed, water no longer beads on the surface, or boards feel dry and thirsty. Recoat before the wood turns silver; once it grays, you are back to brightening and heavier prep. A light annual rinse extends any stain’s life.
Where to buy and what to budget
Buy fence stain at Home Depot, Lowe’s, Menards, Ace, Sherwin-Williams, or online, and budget roughly $30-60 per gallon plus $30-60 in prep and application supplies. A typical 150-linear-foot backyard fence (both sides) runs 4-8 gallons, so plan $150-400 in stain for a full job.
Do not skip the prep budget: a fence/deck cleaner, a wood brightener, brushes or a pump sprayer, drop cloths, and gloves add up but directly determine how long the stain lasts. Buying one extra gallon to box your cans is cheap insurance against a color mismatch mid-fence.
Frequently Asked Questions
What is the difference between transparent, semi-transparent, semi-solid, and solid fence stain?
The difference is pigment load, which controls how much wood grain shows and how much UV protection you get. Transparent shows full grain with the least protection (1-2 years). Semi-transparent shows most grain (2-4 years). Semi-solid shows only texture (3-5 years). Solid hides grain entirely like paint and lasts longest (4-7 years). More pigment means more protection but less visible wood.
How long does fence stain last before you need to reapply?
Fence stain lasts one to seven years depending on opacity and prep. Transparent stains fade in one to two years, semi-transparent in two to four, and semi-solid or solid grades hold three to five years or more. The common 3-5 year claim applies to higher-opacity stains on well-prepped wood. Recoat when water stops beading or color fades, before the wood turns gray.
Do I need to seal a fence after staining, or does stain-and-sealer do both?
Most modern fence stains are stain-and-sealer combos that color, block UV, and repel water in one product, so a separate sealer is usually unnecessary. Check your label: if it says “stain and sealer” or “waterproofer,” you are covered. Add a clear sealer only if you used a bare toner or transparent stain that does not claim water repellency. Do not seal over a waterproofing solid stain.
What is the best fence stain for a wood fence?
The best fence stain matches your wood’s age and condition, but on value Behr Premium and Home Depot house lines lead, while Ready Seal and TWP 1500 lead on durability and ease. Semi-transparent suits new cedar and pine; solid suits old or previously coated wood. For first-timers wanting no lap marks, Ready Seal applies without back-brushing. Compare cost per square foot, not just price per gallon.
Should I use oil-based or water-based fence stain?
Water-based stain is the practical DIY choice: it dries in one to four hours, cleans up with soap and water, resists mildew, holds color, and meets low-VOC rules in states like California. Oil-based penetrates deeper and enriches grain but dries slowly and carries higher VOCs. For most homeowners a quality water-based or hybrid stain wins; choose oil for deep grain enrichment on premium cedar.
How do I prep a fence before staining (new vs weathered vs previously stained)?
Clean, dry, and de-gray the wood first, since prep is the top cause of stain failure. New wood needs a light wash and maybe a short weathering wait. Weathered gray wood needs a cleaner plus a brightener to reopen pores. Previously stained wood needs the old coating assessed, then matched or stripped. Always let the wood dry 24-48 hours and test moisture below 15% before staining.
How long should pressure-treated wood dry before staining?
Pressure-treated wood must dry before staining, ranging from one to two weeks for kiln-dried-after-treatment (KDAT) boards to one to three months for standard wet-treated stock. Do not go by date alone. Test it: sprinkle water on the board, and if it soaks in within a minute the wood is ready. A moisture meter should read 15% or below. Staining too soon is a top failure cause.
What is the best way to apply fence stain: brush, roller, or sprayer?
Brush gives the deepest penetration, a sprayer is fastest for large fences, and a roller sits in between. The best result for most homeowners is spraying or rolling to lay stain on quickly, then back-brushing to work it into the grain. Always work one board or section at a time, keep a wet edge to avoid lap marks, and coat every edge and post.
How many coats of stain does a fence need and how much per gallon?
Most fences need one to two coats, and a gallon covers roughly 150-300 square feet on smooth wood, less on rough or weathered boards. Transparent and semi-transparent stains often need only one coat; add a second only if the label allows and the wood still looks thirsty. Estimate square footage (length times height, both sides, plus posts) and buy one extra gallon to box cans for color consistency.