Self Watering Plant Systems: How They Work and What to Buy
A self watering plant setup is a pot with a sealed reservoir in the base that feeds moisture up into the soil through a wick or a porous medium, so the plant drinks on its own schedule for days to two weeks between refills. The reservoir does not water on a timer. It uses capillary action: as roots pull moisture from the soil, more water creeps up from the reservoir to replace it. That self-regulating behavior is why these pots suit moisture-loving houseplants and frustrate anyone trying to grow a cactus. This guide covers how the system actually works, which plants belong in one and which do not, how to set a pot up so it does not fail in the first month, and how to diagnose root rot and salt buildup when they show up.
How does a self watering plant pot work?
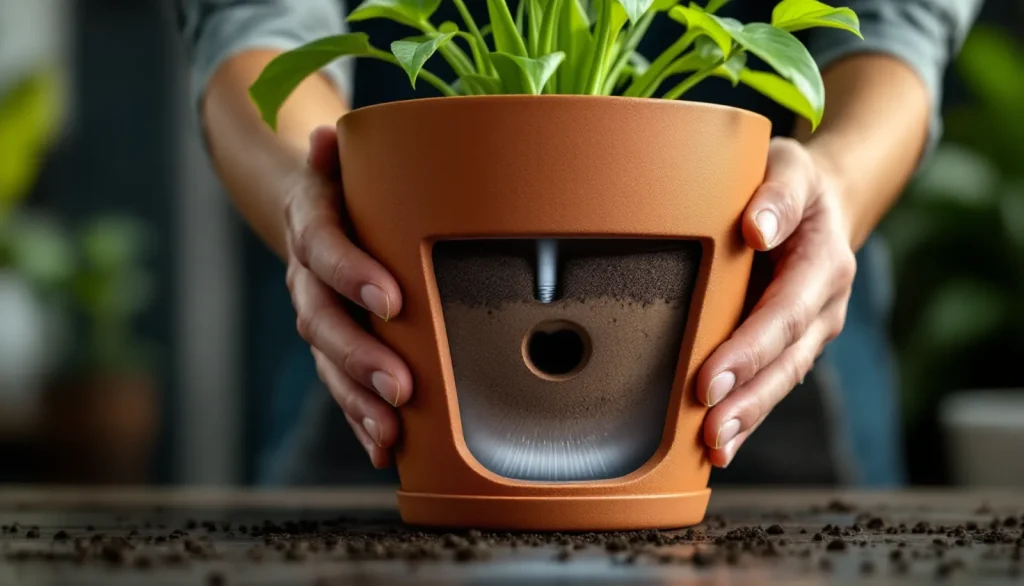
A self watering pot moves water from a bottom reservoir into the root zone by capillary action, the same physics that pulls liquid up a paper towel. There is no pump and no electricity. The soil and a wick stay in contact with the stored water, and the plant draws what it needs while the rest waits below.
Every self-watering planter has four parts: an upper growing bed that holds soil and the plant, the potting mix itself, a water reservoir in the base, and a wicking system that connects the two. The wick can be a cotton or felt cord, a column of soil dipping into the water, or a mineral medium like LECA or pon that touches the reservoir directly.
An overflow hole sits at the top of the reservoir on most quality pots. It caps the water level and dumps excess if you overfill or if heavy rain reaches an outdoor planter, which is the feature that prevents the roots from sitting in standing water. Pots without an overflow are the ones most likely to drown a plant.
Which plants work in a self watering planter (and which fail)?
Self-watering planters suit plants that want consistently moist soil and punish plants that need to dry out between waterings. Match the pot to the plant’s water preference and the system works on its own. Ignore that match and you get root rot fast.
Moisture-loving houseplants are the reliable winners. Peace lily, calathea, pothos, philodendron, monstera, spider plant, ferns, fittonia, and rubber plant all hold up well because they tolerate or prefer steady moisture. Most leafy herbs do too: basil and parsley produce more with even water than with the dry-then-flood cycle of hand watering.
Drought-adapted plants fail in these pots. Cacti, succulents, snake plant (Sansevieria), and ZZ plant store water and need their soil to dry fully between drinks. A constantly damp reservoir keeps the roots wet and rots them. Skip self-watering pots for these, and reconsider any reservoir setup in a cold, dark room in winter, when even thirsty plants slow their water uptake.
| Plant group | Examples | Self watering pot? | Why |
|---|---|---|---|
| Tropical foliage | Peace lily, calathea, pothos, philodendron, monstera, fittonia | Yes | Prefer steady, even moisture; tolerate a damp root zone |
| Ferns | Boston fern, maidenhair | Yes | Need constant moisture they rarely get from hand watering |
| Leafy herbs | Basil, parsley, mint, cilantro | Yes | Higher yield with consistent water |
| Succulents and cacti | Echeveria, aloe, most cacti | No | Need full dry-down; constant moisture rots roots |
| Drought-tolerant foliage | Snake plant, ZZ plant | No | Store water, thrive on neglect, hate soggy soil |
| Woody herbs | Rosemary, lavender, thyme | No | Mediterranean plants that prefer lean, dry soil |
How do you set up a self watering pot so it does not fail?
Set up a self watering pot by using a light, absorbent mix, wetting the whole soil column at planting, and top-watering for the first few weeks until roots reach the wick zone. The most common first-month failure is a full reservoir sitting under bone-dry surface soil because the roots have not grown down to the capillary path yet.
- Choose an absorbent mix. Use a light blend rich in coco coir or peat, with perlite or vermiculite for air. Avoid dense garden soil and avoid pure cactus mix; the soil has to wick water upward while still holding oxygen.
- Plant and top-water thoroughly. Water from the top once so the entire soil column is wet and in contact with itself, including the wick. Skipping this leaves the upper root zone disconnected from the reservoir below.
- Top-water for the establishment period. For the first two to four weeks after potting, keep watering from the top. Young roots have not reached the wicking zone yet, so the reservoir alone cannot keep the surface soil moist.
- Fill the reservoir and switch over. Once roots have grown down, fill the reservoir through the fill tube and let the wick take over. Stop top-watering except for periodic salt flushes.
- Watch the gauge and the gap. Refill only when the indicator nears empty. Let the reservoir run low between fills so air reaches the roots; a reservoir kept full at all times is the second most common cause of rot.
How long can a plant go between refills?
Most self-watering plants go a few days to about two weeks between refills, depending on plant size, reservoir capacity, light, temperature, and humidity. Tested consumer planters such as the Gardenix Decor and Bloem Ariana are rated near two weeks for typical houseplants. A large, thirsty plant in bright summer light can drain a small reservoir in three to four days.
Reservoir size drives the interval more than any other single factor. A small wick-cord pot may hold only a cup of water, while a Lechuza Classico or a deck planter holds enough for two weeks or more. Heat and bright light raise transpiration and shorten the interval; cool, dim winter conditions stretch it, which is exactly when you should let the reservoir run dry between fills.
Do self watering pots cause root rot or salt buildup?
Self watering pots do not cause root rot on their own, but misuse does: the wrong plant, a reservoir kept constantly full, dense soil with no air, or no overflow. Salt buildup is a separate and predictable problem because fertilizer minerals concentrate near the surface as water evaporates instead of draining out the bottom.
Root rot starts when roots sit in water with no oxygen long enough for decay microbes to take hold. The fixes are structural: pick a moisture-loving plant, use airy soil with perlite or pumice, keep an air gap by letting the reservoir empty between refills, and confirm the pot has a working overflow. A pot that never dries even slightly is set up to fail.
Salt buildup shows as a white crust on the soil surface or pot rim and as brown leaf tips. Because bottom watering never rinses the soil, dissolved fertilizer salts creep upward and concentrate. Flush the pot from the top every three to six months: pour clean water through the soil and let it run out the overflow for several minutes to wash the salts out. Go light on fertilizer, since liquid feed in a reservoir concentrates fast.
| Symptom | Likely cause | Fix |
|---|---|---|
| Dry surface soil, full reservoir, new plant | Roots have not reached the wick yet | Top-water for two to four more weeks until established |
| Yellowing leaves, mushy stems, sour smell | Root rot from constant saturation | Let reservoir empty between fills; check overflow; repot if roots are black |
| White crust on soil or rim, brown leaf tips | Fertilizer salt buildup | Top-flush for several minutes every three to six months; cut feeding |
| Algae or mold on soil surface | Damp surface plus light | Let surface dry between fills; reduce light on the soil; clean reservoir |
| Reservoir drains in two to three days | Plant too large or pot too hot and bright | Move out of direct heat or upsize the reservoir |
Should you buy a self watering planter or make one?
Buy a sealed self-watering planter when you want a reliable overflow and water gauge with no fuss; make a DIY version when you already own a pot you like or want to convert a nursery pot cheaply. HMNDP does not sell planters, so this is a decision guide, not a storefront.
What to look for when buying: a clear water-level indicator so you are not guessing, a working overflow hole to cap the reservoir, a reservoir sized to your plant and refill patience, and a drop-in nursery insert design (as on the Lechuza Cube) if you want to swap plants without repotting. Plastic resin is the common material and holds up indoors and out.
The DIY route works for confident gardeners. Thread a cotton cord through the drainage holes of a nursery pot, sit the pot on a ridge or riser inside a larger watertight cachepot, and let the cord dangle into the water below. With LECA or pon you can skip the cord entirely as long as the medium touches the water. The catch is no built-in overflow, so you have to watch the level yourself.
| Option | Typical cost | Best for | Trade-off |
|---|---|---|---|
| Sealed planter (e.g. Lechuza, Bloem) | Around $15 to $75 | Set-and-check reliability | Higher upfront cost |
| Drop-in reservoir insert (e.g. Elho) | Around $10 to $30 | Keeping a pot you already own | Must match insert to pot size |
| DIY wick conversion | Under $10 | Nursery pots and cachepots on hand | No overflow; you monitor the level |
Self watering pots versus other low-maintenance watering
Self-watering pots suit individual indoor containers, while drip irrigation suits beds, rows, and many outdoor pots on one line. Both reduce hand watering, but they solve different problems. A reservoir pot is self-contained and portable; a drip system covers a whole garden but needs plumbing and a timer.
For a single moisture-loving houseplant or a balcony herb pot, a self-watering planter is the simpler choice. For foundation beds, raised beds, or a row of outdoor containers, a tubed system scales better. Our guide to how to install drip irrigation walks through the outdoor option step by step. If overwatering is your real worry, matching soil and fertilizer to the plant matters as much as the pot, which our NPK fertilizer guide and best plant fertilizer picks both cover. For broader plant-care reading, start at the HMNDP learn hub.
Last reviewed: June 2026
HMNDP Editorial Team, reviewed by HMNDP turf and horticulture editors.
Frequently asked questions
Can you overwater with self-watering pots?
You are less likely to overwater with a self-watering pot because the plant draws water up by capillary action only as the soil dries. The risk is structural, not from too many refills: a reservoir kept constantly full, dense soil with no air, or a pot with no overflow hole can still keep roots saturated and cause rot.
Do self-watering pots cause root rot?
Self-watering pots generally do not cause root rot when used properly. Rot comes from the wrong plant, soil with no air, or a reservoir kept full at all times. Use a moisture-loving plant, an airy mix with perlite, let the reservoir empty between refills, and confirm the pot has a working overflow hole.
What plants do not like self-watering pots?
Cacti, succulents, snake plant, ZZ plant, and woody Mediterranean herbs like rosemary and lavender do poorly in self-watering pots. These plants store water and need their soil to dry fully between waterings. Constant moisture from a reservoir keeps their roots wet and rots them, so hand water them instead.
How do you set up a self-watering planter?
Use a light, absorbent mix rich in coir or peat with perlite, then top-water thoroughly so the whole soil column is wet and touches the wick. Keep top-watering for two to four weeks until roots reach the wicking zone. Then fill the reservoir, switch to the wick, and refill only when the gauge nears empty.
How long can a plant go between refills?
Most self-watering plants go a few days to about two weeks between refills, depending on plant size, reservoir capacity, light, heat, and humidity. Tested planters like the Gardenix Decor and Bloem Ariana rate near two weeks for typical houseplants, while a large plant in bright summer light can drain a small reservoir in three to four days.
Do self-watering pots attract mosquitoes?
A sealed reservoir with an enclosed fill tube gives mosquitoes little open standing water to breed in, so a quality self-watering pot is low risk. Open trays, overfilled saucers, or DIY cachepots with exposed water can attract them. Keep the fill opening covered, do not let water sit in an open saucer, and flush the reservoir periodically.
What is the disadvantage of self-watering pots?
The main drawbacks are cost, fertilizer salt buildup, and the need to match the plant correctly. Bottom watering never rinses the soil, so salts concentrate near the surface and need a top-flush every three to six months. Sealed planters also cost more than plain pots, and drought-loving plants will rot in them.
What soil do you use in a self-watering pot?
Use a light, absorbent mix that wicks water upward while still holding air, typically rich in coco coir or peat with perlite or vermiculite. Avoid dense garden soil, which stays soggy and starves roots of oxygen, and avoid pure cactus mix, which drains too fast for the wick to keep the surface moist.