
By HMNDP Editorial Team, independent reporting on lawn care, landscaping, water, and the green-industry business.
Last reviewed: June 2026
Self watering planters at a glance: what to buy and what to skip
Self watering planters are pots with a built-in bottom reservoir that lets plants draw water upward through wicking or sub-irrigation, so you refill every 1 to 4 weeks instead of daily. They suit thirsty plants (tomatoes, herbs, peace lilies, ferns) and forgetful or traveling owners. They are wrong for plants that need to dry out, such as succulents, cacti, orchids, and snake plants, which rot in constant moisture.
This guide ranks 7 planter types by use case, explains the mechanism in plain terms, matches sizes to specific plants, and lists the exact maintenance most product pages skip. We also cover a DIY conversion you can build for under $15.
Quick comparison: 7 self-watering planter picks
| Pick | Best for | Typical size range | Reservoir style | Indoor or outdoor | Typical price |
|---|---|---|---|---|---|
| Lechza-style wick pot | Indoor foliage, beginners | 4 to 16 in diameter | Wick + water gauge | Indoor | $25 to $90 |
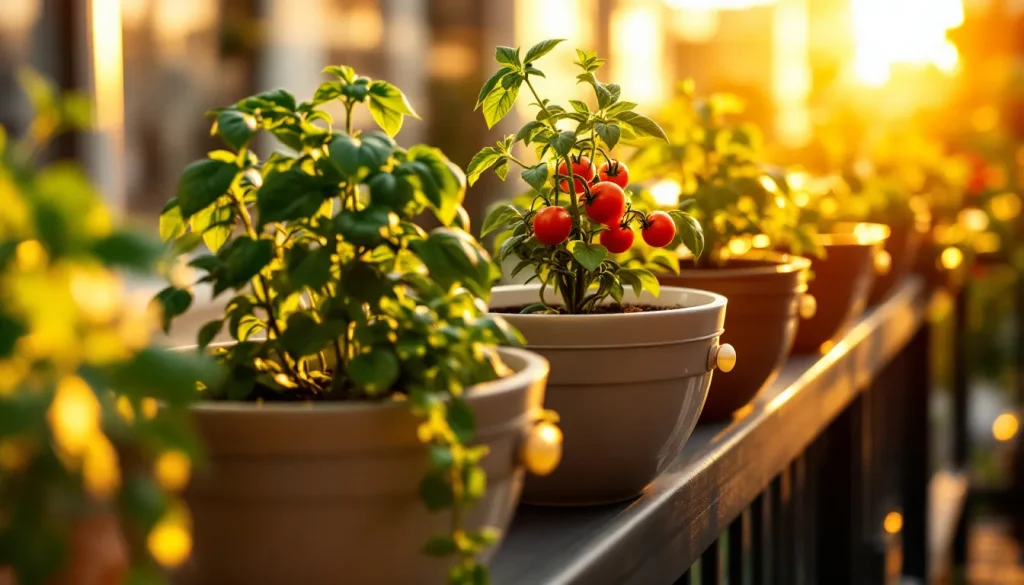
| Self-watering rail/railing planter | Balcony and patio herbs | 18 to 30 in long | Bottom reservoir | Outdoor | $20 to $50 |
| Large UV-stable resin planter (Crescent Garden style) | Patio shrubs, small trees | 16 to 32 in diameter | Sub-irrigation insert | Outdoor | $80 to $250 |
| Grow box / sub-irrigation mat planter | Vegetables, high-yield growing | 4 to 16 gallon | Wicking mat + fill tube | Outdoor | $40 to $130 |
| Hanging self-watering basket | Trailing plants, ferns | 10 to 14 in | Small bottom reservoir | Both | $15 to $40 |
| Stackable / vertical self-watering tower | Small spaces, strawberries, lettuce | Stacked tiers | Central column reservoir | Both | $30 to $80 |
| DIY plastic-bin conversion | Budget, tomatoes, peppers | 5 to 18 gallon | Reservoir + wick (DIY) | Outdoor | Under $15 |
How self watering planters work (reservoir plus wicking)
A self watering planter works by storing water in a sealed reservoir at the base and letting the soil pull that water upward through capillary action, the same physics that draws coffee up a paper towel. Roots and the potting mix wick moisture on demand, so the plant sips steadily between refills rather than getting flooded then drying out. There is no pump and no electricity.
Two designs dominate. In a wicking pot, a column of soil (or a fabric/rope wick) dips into the reservoir and carries water up to the root zone. In a sub-irrigation system, a perforated false floor or a capillary mat sits above the water and the mix wicks moisture across the whole base.
The result is consistent soil moisture, which is exactly what most foliage and vegetables prefer. It also means the planter only holds the water the plant can use, instead of the daily soak-and-drain cycle of a standard pot. For the science of consistent root-zone moisture and why it reduces stress, see our explainer on how self-watering plant systems keep roots evenly moist.
The water level indicator (gauge)
A water level indicator is a small float or clear window on the side of the planter that shows how full the reservoir is, usually marked min and max. It tells you exactly when to refill so you never guess. Many indoor pots from Lechuza and similar brands include one; on DIY and budget models you simply check the fill tube.
The gauge removes the main failure point for beginners: refilling on a schedule the plant did not ask for. You water when the float drops to minimum, then top up to max, and let the plant draw it down again.
Going weeks without watering: the real low-maintenance benefit
The headline benefit of a self watering planter is interval, not magic: depending on plant size, pot size, and heat, a full reservoir lasts roughly 1 to 4 weeks. A small desktop pot may go 7 to 10 days. A large patio reservoir holding 2 to 4 gallons can carry a mature plant 2 to 3 weeks in mild weather. That is what makes them popular with travelers and busy professionals.
Interval shrinks in summer heat and grows in cool or dormant months. A tomato in July on a hot balcony may drain a reservoir in 4 to 6 days. The same planter in October might last 3 weeks. Watch the gauge for the first month and you will learn your own rhythm.
Indoor vs outdoor self watering planters
Indoor self watering planters prioritize clean looks, no drips, and an enclosed reservoir (no overflow hole indoors, since spills hit the floor). Outdoor models prioritize an overflow drain so rain cannot drown the roots, plus UV, frost, and shatter resistance. The mechanism is identical; the build and the drainage differ.
| Factor | Indoor model | Outdoor model |
|---|---|---|
| Overflow hole | Usually none (manual fill control) | Required, to dump rain overflow |
| Material focus | Decorative, lightweight plastic or ceramic | UV-stable resin, frost-resistant |
| Algae risk | Low (less light on reservoir) | Higher (sun on water) |
| Refill interval | Longer (stable temps) | Shorter in summer heat |
Sizes and materials: matching the planter to your space
Self watering planters run from 4-inch desktop pots to 32-inch patio vessels and 16-gallon grow boxes. Most are molded plastic or resin because it is lightweight and holds a watertight reservoir easily; premium outdoor lines use thick UV-stable resin or powder-coated metal over a plastic liner. Pick size by root volume first, looks second.
Lightweight plastic matters more than buyers expect. A filled 24-inch ceramic planter can exceed 80 pounds; the same size in resin with a reservoir stays movable on a balcony. For rooftops and railings, weight limits are real, so resin usually wins.
Weather, frost, UV, and shatter resistance for outdoor models
Outdoor self watering planters need three properties: UV stabilizers so the resin does not chalk or crack after a season in the sun, freeze tolerance so water in the reservoir does not split the shell, and shatter resistance for handling. Brands like Crescent Garden market double-walled UV-stable resin specifically for this. Terracotta and untreated ceramic crack in freeze-thaw and are poor outdoor choices in cold climates.
The freeze risk is the reservoir, not the soil. Always empty and drain the reservoir before the first hard frost (see winter care below), because trapped water expands when it freezes and can crack even durable shells.
Which plants should NOT go in a self watering planter
This is the mistake that kills plants and the question most product pages dodge: self watering planters are wrong for any plant that needs its soil to dry out between waterings. The constant reservoir moisture rots their roots. Keep these out of sub-irrigation pots and use a free-draining pot with drainage holes instead.
- Succulents and cacti (echeveria, aloe, jade): adapted to drought, they rot within weeks in steady moisture.
- Snake plant (Sansevieria) and ZZ plant: store water in rhizomes and resent wet feet.
- Orchids (Phalaenopsis): epiphytes that need air around roots and a dry-down cycle.
- Lavender, rosemary, and most Mediterranean herbs: prefer lean, dry soil and hate a wet base.
- Cacti-mix and bromeliads generally: long-term sitting water invites rot.
Good matches are plants that like even moisture: peace lily, pothos, ferns, fittonia, basil, mint, parsley, tomatoes, peppers, leafy greens, and most annual flowers. When in doubt, ask whether the plant likes to dry out. If yes, skip the reservoir.
Do self watering planters cause root rot or overwatering?
A properly used self watering planter rarely causes overwatering because the plant pulls only what it needs through the wick; the soil surface stays drier while the deeper zone stays moist. Root rot happens in two situations: putting a dry-loving plant in one (see the list above), or keeping the reservoir topped up during dormancy when the plant is barely drinking. Let the reservoir run dry between refills.
The fix is discipline, not distrust of the design. Allow the gauge to reach minimum and the lower soil to breathe before you refill. In winter, many plants want the reservoir empty for weeks at a time.
Size-to-plant matching guide
Match reservoir and pot size to root volume, not to the plant’s current height. Undersized pots drain in days and stress the plant; oversized pots hold more water than a small root system can use, which invites rot. Use this as a starting point, then adjust to your climate.
| Plant | Minimum pot diameter / volume | Notes |
|---|---|---|
| Herbs (basil, parsley, mint) | 6 to 8 in | Mint spreads, give it its own pot |
| Leafy greens (lettuce, spinach) | 8 in / 2 to 3 gal | Shallow roots, wide is better than deep |
| Peppers | 10 to 12 in / 3 to 5 gal | Steady moisture reduces blossom drop |
| Tomatoes (determinate) | 14 in / 5 to 7 gal | Even moisture cuts blossom-end rot |
| Tomatoes (indeterminate) | 18 in / 10+ gal | Needs a large reservoir, refill often in heat |
| Fiddle leaf fig | 14 to 16 in | Likes moisture but let reservoir empty between fills |
| Pothos / peace lily | 8 to 10 in | Excellent self-watering candidates |
Steady soil moisture is also why self-watering vegetable setups pair well with balanced feeding. If you grow edibles, match the watering rhythm to your feeding plan using our guide to organic fertilizer for a vegetable garden.
Maintenance specifics: refill, flush, algae, fertilizer, and winter
Self watering planters are low-effort, not no-effort. Five routines keep them healthy: refill on the gauge, flush salts monthly, block algae, dose fertilizer carefully because nothing washes out the bottom, and empty the reservoir for winter. These are the details product pages leave out.
How often to refill
Refill when the water level indicator hits minimum, typically every 1 to 4 weeks depending on plant, pot size, and heat. Do not refill on a fixed calendar day; refill on the gauge. Letting the reservoir run empty for a day before topping up gives roots oxygen and prevents the soggy-base rot that fixed-schedule refilling causes.
Flushing salt and mineral buildup
Because a self watering planter does not flush water out the bottom, fertilizer salts and hard-water minerals concentrate in the soil over time and can crust the surface or burn roots. Once a month, top-water from above until it runs out the overflow (outdoors) or flush the pot in a sink (indoors) to rinse salts out. Rainwater or filtered water reduces buildup in hard-water areas.
Algae prevention
Algae grows where light hits standing water, mainly in clear or sun-exposed reservoirs. Use an opaque planter or cover the fill tube, keep the reservoir shaded, and rinse the reservoir when you flush salts. A capful of 3% hydrogen peroxide in the refill water occasionally helps without harming most plants. Algae is cosmetic more than dangerous, but heavy growth can clog wicks.
Fertilizer dosing in a wicking system
Feed at half the label strength and more often, because in a sub-irrigation pot nutrients are not rinsed away with each watering and can accumulate. Liquid fertilizer mixed into the reservoir at quarter to half strength every 2 to 4 weeks during the growing season works for most edibles and foliage. Flush monthly (above) to keep salts from building up alongside the steady feeding.
Winter and empty-reservoir care
For outdoor planters in freezing climates, empty and drain the reservoir before the first hard frost, because freezing water expands and can crack even UV-stable resin. For dormant houseplants, let the reservoir stay empty for weeks and water sparingly from the top, since a barely-drinking plant on a full reservoir is the classic winter root-rot setup.
DIY self watering planter: build one for under $15
You can convert any plastic container into a self watering planter with a reservoir and a wick in about 20 minutes. The principle is the same as commercial pots: a water chamber at the bottom, a wick or soil column pulling water up, an overflow hole so it cannot flood, and a fill tube to add water. Total cost is usually under $15 with parts from a hardware store.
- Take a 5-gallon bucket or storage bin and a smaller perforated container (or a plastic cup) to sit inside as the wicking basket.
- Drill many holes in the small container and pack it with potting mix; this is the wick that touches the water.
- Set it in the bottom of the large container to create a reservoir 2 to 4 inches deep.
- Drill one overflow hole in the side of the large container at the top of the reservoir line so excess water drains out, not into the soil.
- Insert a rigid fill tube (PVC or an open bottle) from the top down into the reservoir.
- Fill with potting mix, plant, then water from the top once to settle the soil, after which you fill only through the tube.
Use a light, peat or coir-based potting mix that wicks well; heavy garden soil does not draw water upward and will stay dry at the top. The same overflow-and-reservoir logic behind home rainwater capture appears in our walkthrough of a backyard rain garden build, useful background on managing where water goes.
Drainage and overflow holes (why they matter)
An overflow hole is the safety valve of a self watering planter: it sets the maximum reservoir level and dumps any excess so the soil never sits flooded. Outdoor planters must have one, because a hard rain would otherwise fill the reservoir past the wick and waterlog the roots. Indoor planters often omit it and rely on you not overfilling, which is why the gauge matters indoors.
If a planter has neither an overflow hole nor a gauge, treat it cautiously: it is easy to overfill and drown a plant. Drill your own overflow hole at the reservoir’s top line if the design allows.
Where to buy and how to shop the collections
Self watering planters are sold by garden specialists (Gardener’s Supply Company), design-led brands (Crescent Garden, Lechuza), and general retailers (Amazon, big-box garden centers). Shop by use case from the comparison table above, not by looks alone: confirm reservoir size, whether there is a gauge, and whether outdoor models state UV and frost resistance before buying.
For balconies and rooftops, check the filled weight and choose lightweight resin. For vegetables, prioritize reservoir volume (5 gallons or more for tomatoes). For more buying frameworks and plant-care explainers, browse the HMNDP Learn library and our ongoing green-industry reporting.
Frequently Asked Questions
How do self watering planters work?
A self watering planter stores water in a sealed reservoir at the base, and the potting mix draws that water upward through capillary action (wicking) to the roots on demand. There is no pump or electricity. A wick or soil column dips into the water, or a capillary mat spreads it across a false floor, keeping soil evenly moist between refills that last 1 to 4 weeks.
Are self watering planters good for indoor plants?
Yes, for moisture-loving houseplants like pothos, peace lily, ferns, and fiddle leaf fig, indoor self watering planters reduce watering to once every 1 to 3 weeks and prevent the drought stress of forgetful schedules. Choose an indoor model with a water level gauge and no overflow hole. Avoid them for succulents, cacti, snake plants, and orchids, which rot in constant moisture.
What plants should not be used in self watering planters?
Avoid any plant that needs its soil to dry out: succulents and cacti (echeveria, aloe, jade), snake plant and ZZ plant, orchids, and Mediterranean herbs like lavender and rosemary. The constant reservoir moisture rots their roots within weeks. Put these in standard pots with drainage holes and a fast-draining mix instead, and reserve self-watering pots for moisture-loving foliage and vegetables.
How often do you need to refill a self watering planter?
Refill when the water level indicator reaches minimum, typically every 1 to 4 weeks. Interval depends on plant size, pot size, and heat: a small desktop pot may need refilling every 7 to 10 days, while a large shaded patio reservoir can last 2 to 3 weeks. In summer heat a thirsty tomato may drain it in 4 to 6 days. Let it run empty briefly before topping up.
Can you make a DIY self watering planter at home?
Yes. Convert any plastic bin or 5-gallon bucket for under $15: add a perforated inner container packed with potting mix as a wick, leave a 2 to 4 inch reservoir below it, drill one overflow hole at the reservoir’s top line, and insert a fill tube. Use a light peat or coir mix that wicks well, since heavy garden soil will not draw water upward.
Do self watering pots cause root rot or overwatering?
Used correctly they rarely overwater, because the plant wicks only what it needs and the soil surface stays drier. Root rot happens when you put a dry-loving plant in one, or keep the reservoir full during winter dormancy when the plant barely drinks. Prevent it by matching the right plants, letting the reservoir run empty between refills, and emptying it in winter.
What size self watering planter do I need for my plant?
Match pot size to root volume: 6 to 8 inches for herbs, 8 inches (2 to 3 gallons) for leafy greens, 10 to 12 inches for peppers, 14 inches (5 to 7 gallons) for determinate tomatoes, and 18 inches (10+ gallons) for indeterminate tomatoes. For houseplants, an 8 to 10 inch pot suits pothos and peace lily, and 14 to 16 inches suits a fiddle leaf fig. Oversized pots invite rot.
Are self watering planters good for outdoor use in winter?
They work outdoors year-round only if you manage the reservoir in winter. Empty and drain it before the first hard frost, because freezing water expands and can crack even UV-stable resin shells. Choose frost-resistant resin rather than terracotta or untreated ceramic, which crack in freeze-thaw. During dormancy, leave the reservoir empty and water sparingly from the top instead.