A backyard rain garden is the cheapest and most effective way to handle stormwater runoff from your roof, driveway, and patio without piping it into the municipal storm sewer. Done right, it captures the first inch of runoff from a contributing impervious area, infiltrates it within 24 to 48 hours, and supports a planting palette that beats most ornamental beds in pollinator value. Done wrong, it becomes a mosquito breeding swamp. The difference comes down to three things: sizing the basin correctly, building it where the soil actually drains, and choosing deep-rooted native plants. This is the build guide.
The short version
- Size the basin at roughly 10% of the contributing impervious area (EPA-recommended ratio for most soil types).
- Locate it at least 10 feet from the foundation and 25 feet from a septic drainfield.
- Test infiltration first: if water drains slower than 0.5 inches per hour, you need to amend or relocate.
- Depth 4 to 8 inches at the deepest point, with gently sloped sides at 3:1 or flatter.
- Plants: native deep-rooted species like switchgrass, blue flag iris, swamp milkweed, joe-pye weed, cardinal flower.
- Build cost: $3 to $8 per sq ft DIY, $10 to $20 per sq ft contractor-installed for a 150 to 300 sq ft garden.
What a rain garden actually does (and what it doesn’t)
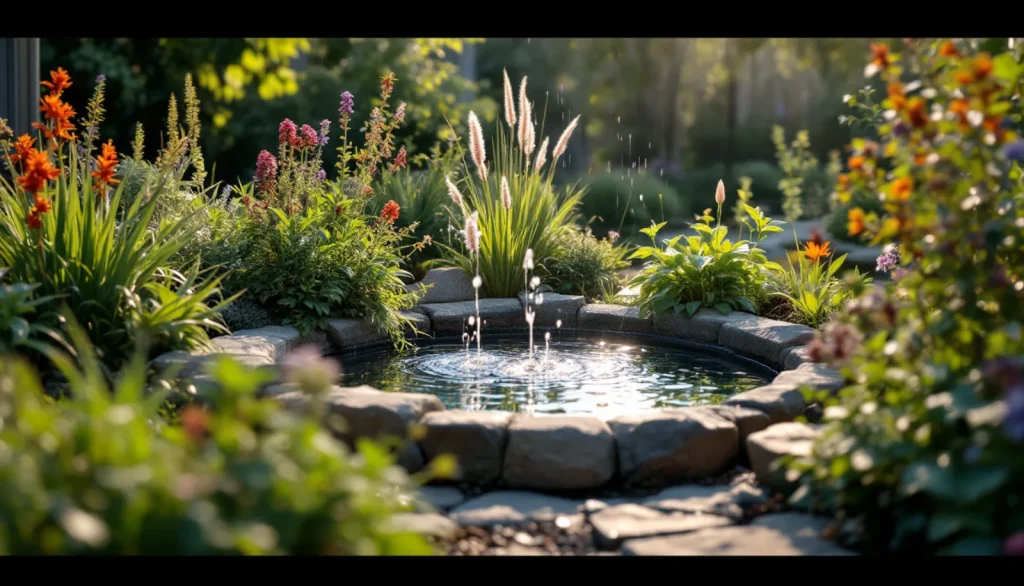
A rain garden is a shallow, planted depression that captures runoff, slows it down, and lets it infiltrate into the soil over 24 to 48 hours. It is not a pond. There is no liner. There is no standing water more than two days after a rain event. If your “rain garden” holds water for a week, you built a swamp.
The EPA’s stormwater design guidance treats rain gardens as bioretention cells. The function is twofold: reduce runoff volume (so less water reaches storm sewers and streams during peak events) and filter pollutants (lawn fertilizer, oil from driveways, sediment) through plant root zones and soil microbes before that water reaches the groundwater table. Municipalities in Seattle, Portland, Minneapolis, Madison, and Maryland’s Anne Arundel County offer rebates of $1 to $5 per sq ft for residential installs because the math works out cheaper than expanding storm infrastructure.
Sizing the basin: the 10% rule and the math behind it
The standard sizing rule for residential rain gardens in most of the US: the rain garden surface area should equal roughly 10% of the contributing impervious area for soils with moderate infiltration (sandy loam to silt loam). Heavier clay soils need closer to 20%. Pure sandy soils can get away with 5% to 7%.
| Contributing area | Soil type | Rain garden size | Approx cost (DIY) |
|---|---|---|---|
| 500 sq ft (one downspout, average roof) | Sandy loam | 50 sq ft | $200 to $400 |
| 1,000 sq ft (half a roof + part of driveway) | Sandy loam | 100 sq ft | $400 to $800 |
| 1,500 sq ft (full roof, suburban home) | Loam | 150 sq ft | $500 to $1,200 |
| 2,000 sq ft (roof + driveway) | Clay loam | 300 to 400 sq ft | $900 to $2,400 |
To calculate contributing area: measure the roof footprint that drains to the relevant downspout, plus any paved area (driveway, patio, walkway) that slopes toward the rain garden. A standard 2,000 sq ft house drains roughly 500 sq ft of roof per downspout (most homes have 4 to 6 downspouts). If you can’t measure on the ground, our square footage measurement guide covers Google Earth and tape measure methods that work just as well for impervious surfaces.
The infiltration test (do this before you dig anything)
Soil that doesn’t infiltrate fast enough means your rain garden will hold water for days, breed mosquitos, and kill the plants. Before committing to a location, run a simple percolation test.
Dig a hole 12 inches deep and 12 inches wide in the proposed location. Fill it with water and let it drain completely (this saturates the surrounding soil). Refill it and time how fast the water level drops. You want at least 0.5 inches per hour, ideally 1 to 2 inches per hour. If the water drops less than 0.25 inches per hour after the pre-soak, the location won’t work without major soil amendment, and at that point you are better off relocating.
Heavy clay soils may need 30% of the basin depth amended with sand and compost (50/50 mix) to hit acceptable infiltration. For 150 sq ft garden at 6-inch depth, you’re amending roughly 2.8 cubic yards of soil, which adds maybe $200 in materials. Worth it if the only good location is clay.
Where to put it (siting rules nobody breaks)
Rain gardens need to be at least 10 feet from any foundation (most municipal codes require this, and it protects basements from saturation), at least 25 feet from a septic drainfield, and at least 10 feet from a property line in most jurisdictions. Avoid areas where water already pools naturally because those spots usually have poor infiltration. Avoid areas with major tree roots within 25 feet (oak, maple, ash) because roots will invade the soft amended soil and outcompete your plantings.
The basin should be downhill from the downspout or runoff source. Use a string level or laser level to verify a gentle slope (1% to 5%) leading into the basin. If the downspout sits below the proposed basin elevation, you need to extend the downspout buried under the lawn and surface at the rain garden inlet. This is doable with 4-inch SDR-35 PVC or corrugated drain tile, but factor the additional $30 to $80 in materials and the labor of trenching across the yard.
Excavation: depth, shape, and the inlet
The basin should be 4 to 8 inches deep at the deepest point, with sides sloped at 3:1 (3 feet horizontal for every 1 foot vertical drop) or flatter. Deeper basins look dramatic on a plan but become safety hazards and dry too slowly. Shape: kidney bean, oval, or organic curves. Avoid sharp corners.
The inlet (where water enters) needs erosion protection. The simplest approach: a 2 to 3 foot wide stone apron of river rock or 1-inch crushed stone over landscape fabric, transitioning from the downspout outflow into the basin floor. Water hitting bare soil at velocity erodes it within three rain events. Don’t skip the stone apron.
The outlet (where overflow goes during big storms that exceed capacity) matters too. The lowest point on the basin’s downhill berm should be 2 to 3 inches below the highest berm point, with stone armoring, so overflow exits in a controlled spot toward a lawn area, swale, or storm drain. Without a designed overflow, big storms find their own overflow path, usually toward something you don’t want flooded.
Soil mix: the bioretention recipe
Don’t backfill with native soil. The standard bioretention soil mix (used by municipal designs from Maryland to Washington) is roughly 60% sand, 20% topsoil, 20% compost by volume. This drains fast, retains enough moisture for plants, and supports microbial activity.
For a 150 sq ft basin at 8-inch effective root depth, you need about 3.7 cubic yards of bioretention mix. Order from a local landscape supply (most can custom-blend if you give them the spec, expect $40 to $75 per cubic yard delivered). Total mix cost for that size: roughly $200 to $350. If the existing native soil already drains well, you can blend 50/50 with the bioretention mix instead of replacing fully.
Plant selection: native, deep-rooted, zone-appropriate
Plants in a rain garden need to tolerate both wet feet (after a storm) and dry conditions (in between storms, especially mid-summer). Native species evolved for exactly this. Big-box ornamental selections often die in year one because they can’t handle the wet-dry oscillation.
The basin has three zones: the bottom (wettest), the side slopes (intermediate), and the upper berm (driest). Match plants to zones.
| Zone | Conditions | Plant examples (native to most of eastern US) |
|---|---|---|
| Bottom of basin | Wet 24 to 48 hours after rain | Blue flag iris, soft rush, sedge (Carex spp), cardinal flower, swamp milkweed |
| Side slopes | Intermediate moisture | Switchgrass, little bluestem, joe-pye weed, bee balm, black-eyed Susan |
| Berm / upper edge | Drier, only saturated in big storms | Purple coneflower, butterfly weed, prairie dropseed, aster, goldenrod |
Plant density: 1 to 2 plants per sq ft for #1 container plants (1-gallon pots), planted in random clusters of 3 to 7 of the same species. A 150 sq ft garden needs roughly 200 to 300 plants. Source from a native plant nursery (Prairie Moon Nursery, Prairie Nursery, or regional natives at local independents). Big-box stores rarely carry true natives. Cost: $4 to $9 per #1 plant, so roughly $1,000 to $2,500 in plant material for a 150 sq ft garden.
Mulch and establishment: the boring part that matters
Mulch the entire basin with 2 to 3 inches of shredded hardwood mulch (not bark nuggets, which float during storms). Skip the dyed mulches. Plain shredded hardwood for $30 to $40 per cubic yard. For 150 sq ft at 3-inch depth, you need about 1.4 cubic yards. Don’t mound mulch against plant stems.
The first season is establishment. Water deeply twice a week if there’s no rain. Most native plant losses happen in weeks 4 through 8 when the gardener thinks the plants are established and stops watering. They aren’t. Hand-water through the first full growing season. Year two, the deep root systems take over and the garden becomes essentially zero-input. For supplemental drip irrigation during establishment year one, our drip irrigation install guide covers tubing layout for irregular planting beds.
Cost summary: DIY vs contractor
A typical 150 sq ft DIY rain garden runs $500 to $1,500 in materials (excavation if you rent a small skid steer for a day, $250 day rate; bioretention mix, plants, mulch, stone). Add maybe 30 hours of labor across two weekends if you have help.
Contractor-installed runs $1,800 to $4,500 for the same garden, depending on regional labor rates and access. Many municipalities offset 50% or more of contractor cost through rebate programs: Seattle’s RainWise program, Maryland’s Stormwater Management Grant, Anne Arundel County’s $2,500 cap reimbursement, Minneapolis MWMO grants. Check your municipality before paying full freight.
Maintenance: the part homeowners skip
Year one: water during dry stretches, hand-weed monthly. Year two and beyond: cut back perennials in late winter (leave standing through winter for pollinator overwintering habitat), divide every 3 to 5 years, top off mulch every 2 to 3 years. Pull invasive species before they seed (Canada thistle, creeping Charlie, garlic mustard).
Monitor infiltration. If after 3 to 5 years the basin starts holding water more than 48 hours after storms, sediment has likely accumulated. The fix is to remove 1 to 2 inches of surface mulch and topsoil, replace with fresh bioretention mix, and re-mulch. This is a $100 to $200 every-5-years maintenance event, not annual. For diagnosis of lawn areas downhill of the rain garden showing wet spots or fungal problems, the brown patches guide covers drainage-related turf issues.
FAQ
Will a rain garden breed mosquitos?
Properly sized and built, no. Mosquitos need standing water for 7 to 10 days to complete their life cycle. A working rain garden drains within 24 to 48 hours. If yours holds water longer than 2 days after a storm, the infiltration is wrong and you have a build problem, not a mosquito problem.
Do I need a permit?
In most US jurisdictions, residential rain gardens under 300 sq ft and less than 12 inches deep do not require permits, but check your local building department. HOA approval is a separate question, and rain gardens with a planted, intentional design usually clear HOA review without issue (a hole in the yard does not).
What if my yard is mostly clay?
You have three options: amend heavily (30% to 50% of basin soil replaced with sand and compost), oversize the basin to compensate for slower infiltration (15% to 20% of contributing area instead of 10%), or build a dry well underneath the rain garden (a buried perforated pipe and gravel reservoir that holds water until it slowly soaks away). Dry well adds $400 to $800 in materials.
Can I put it in the front yard?
Yes, and they often work better there because front-yard downspouts are common runoff sources. Designed properly with a curved shape and intentional planting, a front-yard rain garden reads as an ornamental bed. Some HOAs are picky, so check.
What plants should I avoid?
Avoid woody species (trees, large shrubs) in the basin itself because their roots will eventually outcompete the perennials. Avoid invasive species sold as “rain garden plants” at big-box stores, especially purple loosestrife (illegal to plant in many states) and certain reed grasses. Stick to a regional native plant list from your state native plant society.
Bottom line
A backyard rain garden is the highest-return stormwater project a homeowner can do. Sized at 10% of contributing impervious area, located in soil that infiltrates at least 0.5 inches per hour, planted with native deep-rooted species, and mulched properly, it handles 80% of your roof runoff for a $500 to $1,500 DIY install. The plants outperform an ornamental bed for pollinator value, the runoff stays out of the storm sewer, and after year two the maintenance drops to near zero.
The mistakes that turn rain gardens into mosquito swamps are all avoidable: skipping the infiltration test, oversizing the depth instead of the surface area, using non-native plants that can’t handle the moisture oscillation, and forgetting the overflow outlet. Get those four right and the garden does the rest. For broader landscape integration including how a rain garden fits into a phased yard design, see our 2026 yard design guide. For lawn alternatives that reduce contributing runoff in the first place, the drought-tolerant alternatives guide covers turf replacement options. The learn hub links the rest of the landscape playbook.