
By the HMNDP Editorial Team. Last reviewed: June 2026.
Irrigation design starts with two numbers: your PSI and your GPM
Good irrigation design begins by measuring your home’s static water pressure (PSI) and available flow (GPM), because those two numbers cap how many sprinkler heads can run at once. Everything else (zone count, head spacing, head type) follows from them. Skip this and you get dry spots, misting heads, and zones that starve each other. Measure first, draw second.
A typical residential hose bib reads 40 to 70 PSI static and delivers 8 to 15 GPM. Those ranges decide whether you lean on rotors, spray heads, or drip, and how many zones you split the yard into.
This guide is for DIY homeowners and small-property owners laying out their own lawn or garden system. For broader background, see our complete irrigation system guide.
Step 1: Measure your water pressure (PSI) and flow rate (GPM)
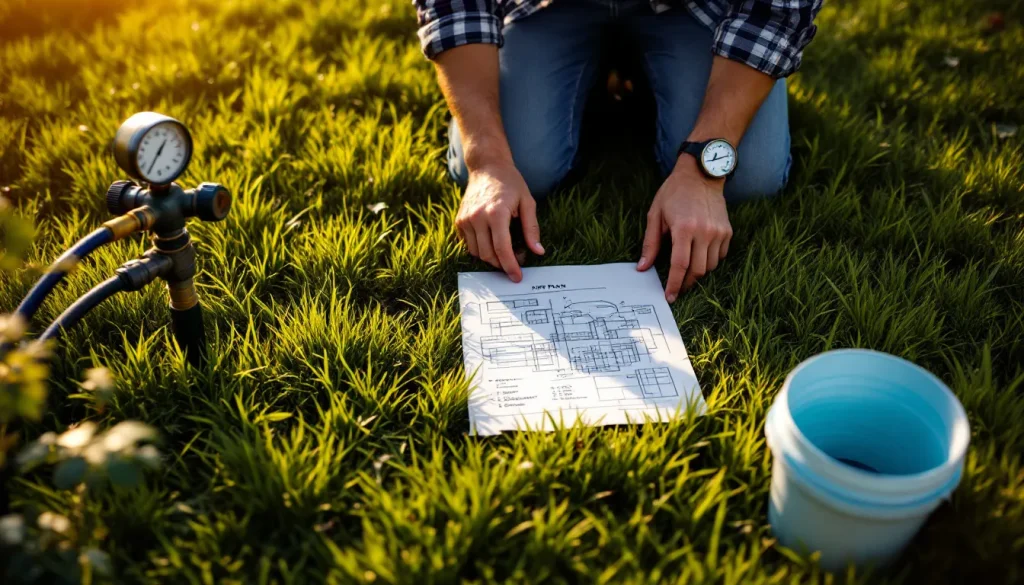
Measure static pressure with a screw-on gauge at an outdoor hose bib (turn off all other water), and measure flow with a bucket test. PSI tells you whether heads will work at all; GPM tells you how many can run together. These two field measurements are the single most important input in any irrigation design, and most online tools skip them.
- Static PSI: Screw a water-pressure gauge ($10 to $15 at any hardware store) onto the hose bib closest to the water meter. Shut off all indoor and outdoor water. Open the bib fully and read the dial. Most homes read 40 to 70 PSI.
- Flow rate (bucket test): Place a 5-gallon bucket under the same bib, open it all the way, and time how long it takes to fill. Convert: GPM = (gallons in bucket) divided by (seconds to fill) times 60. A 5-gallon bucket filling in 30 seconds = 10 GPM.
- Subtract a safety margin: Design to about 75 percent of measured flow so heads never run dry. A measured 10 GPM means you design each zone to draw 7.5 GPM or less.
Write both numbers at the top of your plan. For this guide we will use a worked example yard: 50 PSI static, 10 GPM measured (7.5 GPM usable).
Step 2: Map and sketch your yard
Sketch your lot to scale on graph paper or a free tool, marking the water source, the house, and every area you will water. Measure lot dimensions with a tape or measuring wheel and note grass areas, garden beds, slopes, and shade separately. This map becomes the canvas for zones and head placement, so accuracy here saves rework later.
Use one square per foot (or a set scale like 1 inch = 10 feet). Label each watering area: front lawn, back lawn, foundation beds, vegetable garden. Mark north for sun exposure, and note any spot that drains slowly or sits in shade, since those areas water differently.
Measure the distance from your water source to the farthest area too. Long runs lose pressure (friction loss), which matters when you assign heads to zones.
Step 3: Choose head types: spray heads vs rotors vs drip
Match the head type to the area: spray (fixed) heads for small or oddly shaped lawn patches up to about 15 feet, rotors for large open turf, and drip for garden beds, shrubs, and rows. Mixing types within a single zone is the most common DIY mistake, because they apply water at different rates and cannot share a zone.
| Head type | Best for | Throw radius | Typical flow | Precipitation rate |
|---|---|---|---|---|
| Spray (fixed) heads | Small lawns, narrow strips, tight corners | 4 to 15 ft | 1 to 4 GPM each | 1.5 to 2.0 in/hr |
| Rotors | Large open lawns, 25 ft and wider | 15 to 50 ft | 0.5 to 8 GPM each | 0.4 to 1.0 in/hr |
| Drip / micro | Garden beds, shrubs, vegetables, trees | Point or line | 0.5 to 2 GPH per emitter | Very low, measured in GPH |
The rule that flows from this table: never combine sprays and rotors on one zone. Sprays apply roughly 1.5 in/hr while rotors apply about 0.5 in/hr, so a shared zone overwaters one area and starves the other. For bed watering specifics, see our drip irrigation system guide.
Step 4: Sprinkler head spacing and head-to-head coverage
Space heads so each one’s spray reaches the next head, called head-to-head coverage, meaning 100 percent overlap. Spacing should equal the head’s throw radius, not its diameter. A head with a 15-foot radius goes 15 feet from the next head, not 30. This overlap fixes the dry rings that under-spaced systems leave between heads.
Place heads in your example yard at the corners and along the edges first, then fill gaps. On square or rectangular areas, use a grid. On curved or triangular areas, use a triangular pattern, which spaces heads at about 50 percent of diameter for even coverage.
- Square pattern: heads at corners of a square equal to the throw radius. Good for rectangular lawns.
- Triangular pattern: heads offset in rows. Covers irregular shapes with fewer gaps and is the most water-efficient layout.
- Wind adjustment: in breezy yards, tighten spacing to 45 to 50 percent of diameter so wind drift does not create dry strips.
Step 5: Precipitation rate and why it must match across a zone
Precipitation rate is how fast a head applies water, measured in inches per hour (in/hr). Every head on one zone must share the same rate, because the zone runs for one fixed time. Mismatched rates mean some plants flood while others stay dry. Matching the rate is the technical heart of irrigation design and the reason head types cannot be mixed.
Calculate it with this formula: Precipitation rate (in/hr) = (96.3 times total GPM on the zone) divided by (area in square feet covered). The 96.3 constant converts GPM over square feet into inches per hour.
Example: four spray heads at 2 GPM each (8 GPM total) covering a 600-square-foot lawn section gives (96.3 x 8) / 600 = 1.28 in/hr. To apply 1 inch of water that zone runs about 47 minutes. Manufacturers use “matched precipitation rate” (MPR) nozzles so a half-circle head and a full-circle head on the same zone apply water at the same rate. Buy MPR nozzles and this problem largely solves itself.
Step 6: Group heads into zones using your GPM (worked example)
A zone is a group of heads that one valve turns on together, and the rule is simple: the heads on a zone cannot draw more GPM than your usable supply. Divide your usable GPM by the flow per head to get heads per zone, then divide total heads by heads-per-zone to get zone count. This is the calculation no vendor form shows you.
Work the example yard (50 PSI, 10 GPM measured, 7.5 GPM usable):
- Front lawn (rotors): rotors at 2 GPM each. 7.5 GPM / 2 = 3 rotors per zone. If the front lawn needs 6 rotors, that is 2 zones.
- Back lawn (spray heads): sprays at 1.5 GPM each. 7.5 / 1.5 = 5 spray heads per zone. 10 sprays needed = 2 zones.
- Garden beds (drip): drip draws far less, so all beds usually fit on 1 zone. Drip also runs on its own schedule because its precipitation rate differs from turf.
Total for this yard: roughly 5 zones (2 front rotor, 2 back spray, 1 drip). Higher GPM means more heads per zone and fewer zones; lower GPM means the opposite. A 6 GPM home would split the same yard into 6 or 7 zones.
Step 7: Add a smart controller and efficient scheduling
A smart controller (WaterSense-labeled, weather-based) adjusts run times using local weather instead of a fixed clock, and the EPA estimates these controllers can cut outdoor water use meaningfully versus standard timers. Give each zone its own program because turf, drip, and shade areas need different run times. This step turns a correct layout into an efficient one.
Practical scheduling rules:
- Water early: run between 4 a.m. and 8 a.m. to cut evaporation and wind loss.
- Cycle and soak: on slopes or clay, split run time into 2 or 3 short cycles so water absorbs instead of running off.
- Separate drip: drip zones run longer and less often than spray zones, sometimes once or twice a week.
- Seasonal adjust: a percent-adjust feature scales every zone up in July and down in spring with one setting.
DIY design vs free manufacturer service vs paid pro
You have three realistic paths: design it yourself, submit measurements to a free manufacturer service (Rain Bird, Hunter, Orbit), or hire a licensed contractor. The free services produce a usable plan for a flat lawn but assume your measurements are right and push their own parts. The right choice depends on yard complexity, your comfort with the math, and budget.
| Path | Cost | Best when | Trade-off |
|---|---|---|---|
| DIY design + install | $300 to $1,500 in parts (typical quarter-acre) | Simple, mostly flat yard; you measured PSI/GPM | Your time; errors are on you |
| Free manufacturer design service | $0 (you supply measurements) | Standard lawn, you self-install | Plan is only as good as your inputs; brand-locked parts |
| Paid professional design + install | $2,500 to $6,000+ installed | Large lot, slopes, backflow permits, many zones | Highest cost; least learning |
An honest middle path: do your own PSI and GPM measurements and rough zone map, then submit that to a free service to check your work. Many areas also require a backflow preventer and a permit, which may push complex jobs toward a pro. For full numbers, see our irrigation system cost breakdown, and browse more how-to material in the HMNDP learn hub.
Frequently Asked Questions
How do I design an irrigation system step by step?
Measure your static PSI with a gauge and your GPM with a bucket test, then sketch your yard to scale. Pick head types by area (rotors for big turf, sprays for small, drip for beds), space heads head-to-head, match precipitation rates, and group heads into zones so each zone’s GPM stays under 75 percent of your usable flow. Add a smart controller last.
How do I measure my home water pressure (PSI) and flow rate (GPM) for irrigation?
Screw a $10 pressure gauge onto the hose bib nearest the meter, shut off all other water, and read the static PSI (usually 40 to 70). For flow, time how long a 5-gallon bucket takes to fill, then divide 5 by the seconds and multiply by 60. A 30-second fill equals 10 GPM. Design to 75 percent of that flow.
How many sprinkler zones do I need for my yard?
Divide your usable GPM by the flow per head to get heads per zone, then divide total heads by that number. A 10 GPM home (7.5 usable) running 1.5 GPM sprays fits 5 heads per zone. A typical quarter-acre lawn with separate front, back, and drip areas lands at 4 to 7 zones. Lower flow means more zones.
What is the correct sprinkler head spacing?
Space heads for head-to-head coverage, meaning each head’s spray reaches the next head, so spacing equals the throw radius, not the diameter. A 15-foot-radius head sits 15 feet from its neighbor. Use a square grid on rectangular lawns and a triangular pattern on irregular shapes. In windy yards, tighten spacing to 45 to 50 percent of diameter to prevent dry strips.
What is precipitation rate and why does it matter in irrigation design?
Precipitation rate is how fast a head applies water in inches per hour: (96.3 times zone GPM) divided by area in square feet. It matters because every head on one zone runs for the same time, so mismatched rates flood some plants and starve others. Use matched precipitation rate (MPR) nozzles and never mix sprays with rotors on the same zone.
Should I design my irrigation system myself or hire a professional?
DIY design works well for simple, mostly flat yards once you have measured PSI and GPM, with parts often running $300 to $1,500. Hire a pro for large lots, slopes, many zones, or where local backflow permits apply, where installed costs often run $2,500 to $6,000 or more. A solid middle path is measuring and mapping yourself, then having a free service verify it.
Are free irrigation design tools (Rain Bird, Hunter, Orbit) any good?
Free design services from Rain Bird, Hunter, and Orbit can produce a workable plan for a standard lawn, but the plan is only as accurate as the PSI and GPM measurements you submit, and each service specifies its own brand of parts. They handle flat turf well and rarely optimize drip or complex beds. Measure carefully first, then treat the output as a strong starting draft.
Spray heads vs rotors vs drip: which should I use where?
Use spray (fixed) heads for small or narrow lawn areas under about 15 feet, rotors for large open turf 25 feet and wider, and drip for garden beds, shrubs, vegetables, and trees. Never combine these on one zone, because sprays apply roughly 1.5 in/hr and rotors about 0.5 in/hr, so a shared zone overwaters one area while starving the other.