
By the HMNDP Editorial Team. Last reviewed: June 2026.
How to winterize an irrigation system (the short version)
To winterize an irrigation system, shut off the water at the main irrigation valve, set the controller to off or rain mode, and remove all water from the pipes before the first hard freeze (usually a night at 28°F or lower). Water is cleared one of three ways: manual drain valves, automatic drain valves, or a compressed-air blow-out. Which one you need depends on how your system was plumbed.
Skipping this step is the most expensive lawn mistake in cold climates. Frozen water expands about 9 percent by volume and can split PVC laterals, crack brass valve bodies, and rupture a backflow preventer, a repair that often runs $150 to $600 per component.
Why winterizing matters: freeze and expansion damage
Winterizing matters because trapped water freezes, expands, and breaks the parts it sits inside. The three most vulnerable components are the backflow preventer (thin brass and plastic above ground), the control valves in the manifold, and any exposed PVC or polyethylene piping within 12 inches of the surface.
A cracked backflow preventer is the classic failure. It sits above grade, holds standing water, and freezes first. Replacing a residential reduced-pressure or pressure-vacuum-breaker assembly commonly costs $150 to $400 in parts, plus certified testing in states that require it.
Underground pipe damage is harder to see and worse to fix. A split lateral can mean digging up the yard in spring, so the goal is simple: get the water out before it can freeze.
When to winterize: timing before the first hard freeze
Winterize after the last irrigation of the season but before the first hard freeze, defined as an overnight low of about 28°F or colder for several hours. A light frost near 32°F rarely reaches buried pipe, but a hard freeze can penetrate shallow lines and above-ground brass within one night. Watch the 10-day forecast and act on the first predicted 28°F night.
| Region / zone | Typical first hard freeze | Target winterizing window |
|---|---|---|
| Upper Midwest, Northern Plains, Mountain West | Late September to mid-October | Late September |
| Great Lakes, Northeast, Pacific Northwest interior | Mid to late October | Early to mid-October |
| Mid-Atlantic, lower Midwest, high-desert Southwest | Late October to mid-November | Late October |
| Upper South, transition zone | November | Early November |
When in doubt, go early. There is no penalty for shutting down a week before the freeze, but one missed cold snap can cost hundreds in repairs.
Which drain method does your system use?
Your drainage method is set by how the installer plumbed the low points, not by choice. Check for drain valves at the lowest points of each zone and next to the backflow and manifold. Manual valves are small handles or caps you open yourself. Automatic valves have no handle and open on their own below about 10 PSI. If you find neither, the system was built to be blown out.
| Method | How to identify it | Best for | Clears the pipe fully? |
|---|---|---|---|
| Manual drain | Small manual valves or boiler-drain caps at each low point | Systems graded to drain by gravity | Mostly, gravity-dependent |
| Automatic drain | No visible handle; valves open when pressure drops | Level yards with low points per zone | Mostly, gravity-dependent |
| Blow-out (compressed air) | No drain valves anywhere; flat runs | Flat systems, long laterals, drip zones | Yes, when done correctly |
How to winterize without an air compressor or blow-out
You can skip the blow-out only if your system has working manual or automatic drain valves and the pipe is graded to drain by gravity. Flat runs, drip lines, and systems with no low-point drains hold water no matter how long you wait, so those must be blown out. If you have drains, the process is quiet, free, and safe.
- Close the main irrigation shutoff valve to stop new water entering the system.
- Relieve pressure by opening the test cocks on the backflow preventer.
- Open every manual drain valve at the zone low points and leave them open all winter.
- For automatic drains, activate each zone from the controller for a minute so the valves open and let water fall out.
- Open the boiler drain or drain cap below the backflow to empty the section between the shutoff and the backflow.
- Drain the valve-box manifold using the manifold drain, or loosen a union to let trapped water out of the valve box.
Gravity draining leaves a small amount of residual water. In borderline climates that is usually fine because the remaining volume has room to expand. In severe-freeze zones, a follow-up blow-out is the safer choice even if drains exist.
The blow-out method, step by step
The blow-out method uses compressed air to push water out through the sprinkler heads, one zone at a time. It is the only method that reliably clears flat runs and drip lines. Done wrong, it is also the fastest way to crack a fitting, so the air volume and pressure ceilings below matter more than any single step.
- Shut off the main irrigation water supply and confirm no water is feeding the system.
- Set the controller so you can run zones manually, or plan to open valves by hand.
- Connect the compressor downstream of the backflow preventer, never through it, using the blow-out port or a hose-bib adapter.
- Start with the zone farthest from the compressor. Open that single zone before adding air.
- Introduce air slowly. Let the compressor tank recharge between zones and run each zone only until the heads spit mostly mist, about 1 to 2 minutes.
- Move zone by zone, one at a time, until every zone runs dry. Repeat a second pass on long or drip zones.
- Disconnect the compressor and open a downstream drain to release residual air pressure.
What PSI and CFM to actually use
Blow-out pressure should never exceed about 80 PSI for PVC systems or about 50 PSI for polyethylene (poly) pipe. Pressure clears nothing on its own; airflow volume (CFM) does the work. A typical residential zone needs roughly 10 to 25+ CFM to purge, which is far more than a pancake or hot-dog homeowner compressor delivers.
| Pipe material | Max blow-out pressure | Airflow needed per zone |
|---|---|---|
| PVC (rigid, white) | ~80 PSI (never higher) | ~10 to 25 CFM |
| Polyethylene (black, flexible) | ~50 PSI | ~10 to 25 CFM |
| Drip / micro-tubing | ~30 PSI or per manufacturer | Low volume, longer run |
This is the trap DIYers fall into. A 6-gallon pancake compressor puts out only 2 to 4 CFM, so people crank the pressure to compensate, blow past 80 PSI, and split a fitting. If your compressor cannot supply 10+ CFM, rent a towable 185 CFM unit or hire the blow-out. High pressure will not substitute for missing volume.
Turning off the water supply and control valve
Start every winterization by isolating the irrigation system from the house water. Locate the dedicated irrigation shutoff, usually a ball or gate valve on the supply line near the water meter, basement, or an underground box. Turn it fully closed. This valve, not the backflow, is what stops fresh water from refilling the pipes as you drain.
If the system draws from a separate mainline with its own master valve at the controller, leave that master valve in a state that lets the blow-out air pass, or bypass it as the manufacturer directs. Trapped water behind a closed master valve can freeze and crack the valve body.
Shutting off and insulating the backflow preventer
The backflow preventer is the freeze point most homeowners get wrong. After closing the main supply, set both the inlet and outlet ball valves to a 45-degree angle rather than fully open or fully closed. That partial position lets any trapped water drain and expand without splitting the brass body. Open the small test cocks a quarter turn to release remaining water.
On pressure-vacuum-breaker (PVB) assemblies, freezing water often cracks the bonnet or the poppet inside the vacuum breaker. Some homeowners remove the bonnet and poppet for the season to eliminate that trapped water entirely, then reinstall in spring. Check your assembly model before disassembling, and never force a stuck poppet.
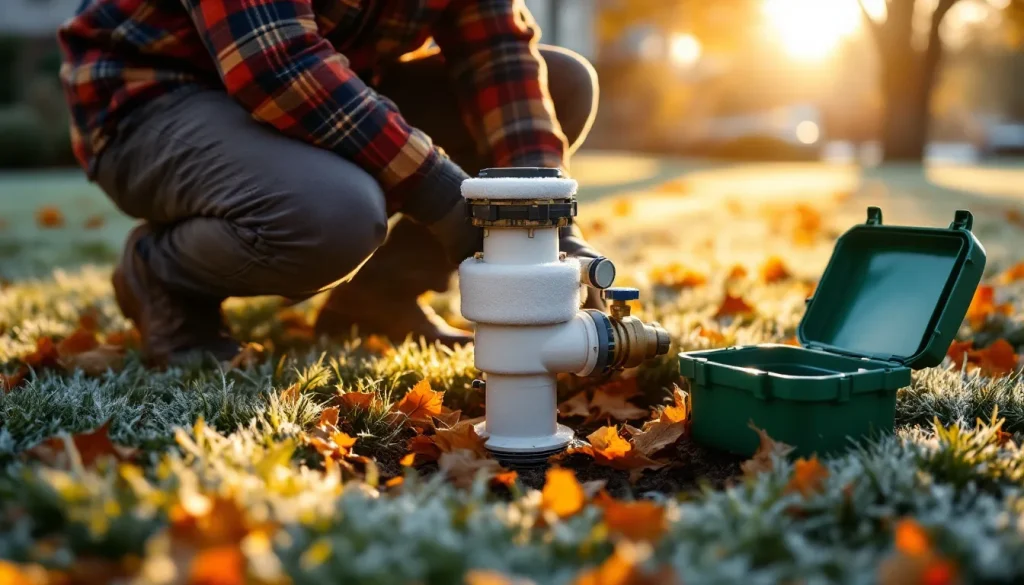
After draining, insulate. Wrap the assembly in foam pipe insulation or a purpose-made insulated bag, and cover exposed brass with insulation tape. Leave the test cocks slightly open so no new water can collect and freeze against the wrap.
Draining the mainline, lateral lines, and valve boxes
Once the supply is off and the backflow is drained, clear the buried pipe and the manifold. The mainline runs from the shutoff to the valves; the laterals run from the valves to the heads. Both need to be empty, along with any standing water in the valve box.
- Open manual mainline and lateral drain valves at the low points, or blow the lines out zone by zone.
- Drain the valve-box manifold through its drain fitting, or loosen a union so trapped water escapes the box.
- Bail or sponge out standing water in the valve box itself, since a submerged valve solenoid can freeze and crack.
- Leave manual drains open through winter so meltwater cannot accumulate.
Shutting down the controller or timer
Set the controller to off or rain mode so it stops sending watering commands, but keep it powered if it stores your programs in volatile memory. Rain mode holds your schedule while pausing all zones, which saves reprogramming in spring. Fully cutting power on some older timers erases the schedule.
If a rain or freeze sensor is wired in, leave it connected. In spring, switch back from rain mode to auto, run each zone briefly, and check for leaks before trusting the schedule.
Insulating above-ground components
Insulate everything that sits above grade and can hold water: the backflow preventer, exposed valves, and any visible piping or risers. Foam pipe sleeves, insulation tape, and insulated backflow covers block wind chill and slow heat loss so residual moisture is less likely to freeze solid.
Do not seal components airtight with plastic alone, which traps condensation. Use breathable insulation, and confirm drains and test cocks stay cracked open underneath the wrap so no fresh water pools inside.
Safety warnings for compressed air
Compressed air is the real hazard in this job. It can launch a sprinkler head, blow debris into your eyes, and rupture a fitting under pressure. Treat every blow-out as a controlled procedure, not a quick chore.
- Wear ANSI-rated eye protection the entire time the compressor is connected.
- Never exceed ~80 PSI on PVC or ~50 PSI on poly, regardless of what the gauge could reach.
- Blow out one zone at a time; never pressurize a closed zone with no open heads to relieve air.
- Never send air through the backflow preventer; connect downstream of it.
- Keep hands, face, and bystanders away from heads and open fittings while air flows.
DIY vs hiring a pro, and what it costs
Hire a professional blow-out if your system has no drain valves, spans many zones, or would need a rented tow-behind compressor you do not otherwise want. A pro brings a high-CFM compressor and clears the system in under an hour. DIY makes sense mainly when you have working manual or automatic drains and can skip compressed air entirely.
| Option | Typical cost | Best when |
|---|---|---|
| DIY manual / auto drain | $0 (drains already installed) | Graded system with working drain valves |
| DIY blow-out, rented compressor | $40 to $100 per day rental | Have the skill and a proper high-CFM rental |
| Professional blow-out service | ~$50 to $150 per visit | No drains, many zones, or drip systems |
Given that a single cracked backflow or split lateral can cost more than several years of professional service, the pro blow-out is inexpensive insurance for systems that truly need air. Spring startup is the reverse of these steps: close the drains, slowly repressurize, and inspect every zone.
For more seasonal lawn and water strategy, see our guides on preparing your lawn and irrigation for drought, installing drip irrigation, controlling moss in cool-season lawns, and the full HMNDP landscaping guides hub.
Frequently Asked Questions
How do I winterize an irrigation system without an air compressor?
You can skip the compressor only if your system has manual or automatic drain valves and pipe graded to drain by gravity. Close the main irrigation shutoff, open every manual drain valve at the low points, activate zones so automatic drains open, and drain the backflow and valve box. Leave manual drains open all winter. Flat runs and drip lines still require a blow-out.
How do I winterize a sprinkler system without a blowout?
Use the manual or automatic drain method. Shut off the water supply, relieve pressure at the backflow test cocks, and open the low-point drain valves so gravity empties the pipes. Empty the valve-box manifold and set the backflow ball valves to 45 degrees. This works when the system was graded to drain; systems without low-point drains need compressed air.
What PSI should I use to blow out my irrigation system?
Stay at or below about 80 PSI for PVC pipe and about 50 PSI for polyethylene (poly) pipe. Drip zones need even less, around 30 PSI. Pressure is not what clears the line; airflow volume does, and each zone needs roughly 10 to 25 CFM. Raising pressure to make up for a low-CFM compressor is the main cause of cracked fittings.
How do I winterize an irrigation system with a backflow preventer?
Close the main supply, then set the backflow inlet and outlet ball valves to a 45-degree angle so trapped water can drain and expand safely. Open the test cocks a quarter turn to release water. On pressure-vacuum breakers, some owners remove the bonnet and poppet for winter. Insulate the assembly with foam or an insulated cover, leaving test cocks cracked open.
When should I winterize my irrigation system before winter?
Winterize before the first hard freeze, an overnight low near 28°F or colder for several hours. In the Upper Midwest and Mountain West that means late September; in the Great Lakes and Northeast, early to mid-October; in the mid-Atlantic and lower Midwest, late October. Watch the 10-day forecast and act on the first predicted hard-freeze night rather than waiting.
Can I winterize my sprinkler system myself or should I hire a pro?
DIY works well if your system has functioning manual or automatic drains, since no compressed air is needed. Hire a pro when the system has no drain valves, has many zones, or includes drip lines, because those require a high-CFM compressor most homeowners do not own. A homeowner pancake compressor lacks the airflow to clear a zone safely.
How much does it cost to winterize an irrigation system?
Draining a system with existing valves costs nothing. Renting a suitable compressor for a DIY blow-out runs about $40 to $100 per day, though homeowner-sized units usually lack the CFM to do the job. A professional blow-out typically costs about $50 to $150 per visit, which is minor compared with a $150 to $600 cracked-component repair.
What happens if I do not winterize my irrigation system?
Trapped water freezes and expands about 9 percent, which can crack the backflow preventer, split PVC laterals, and rupture brass valve bodies. Above-ground parts fail first because they hold standing water and lose heat fastest. Repairs often cost $150 to $600 per component and buried-pipe breaks may require digging up the yard in spring, far exceeding the cost of winterizing.