
By the HMNDP Editorial Team | Last reviewed: June 2026
What an irrigation timer is and how it works
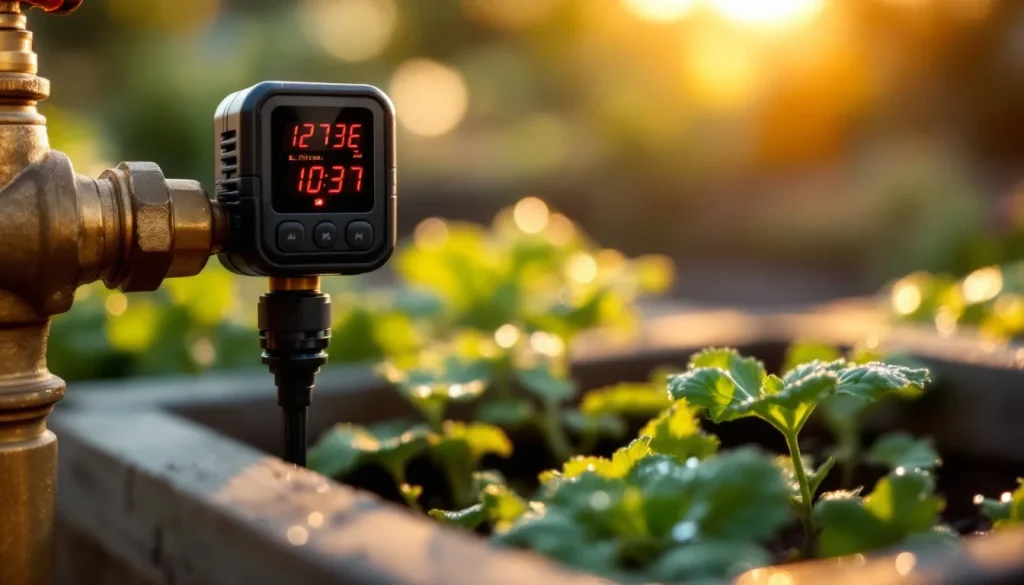
An irrigation timer is a controller that opens and closes your water supply on a set schedule so plants get watered automatically, without you turning a tap. It stores three settings per zone: start time, run duration, and frequency. When a start time hits, the timer sends power to a valve (or a built-in one) that opens, water flows, and it shuts after the run time ends.
Simple hose-bib models use a battery to drive an internal valve. In-ground systems use the timer as a brain that sends 24-volt signals to separate solenoid valves buried in the yard. Either way, the timer is the scheduler, not usually the water source.
Irrigation timer types by how they connect
The fastest way to pick an irrigation timer is by where it connects to your setup. There are four practical categories: hose-bib tap timers, drip irrigation timers, in-ground sprinkler controllers, and single-outlet versus multi-zone units. Your existing plumbing decides most of this before price ever enters the picture.
| Type | Connects to | Zones/outlets | Typical price (2026) | Best for |
|---|---|---|---|---|
| Hose-bib / tap timer | Outdoor faucet threads | 1 to 4 | $20 to $70 | Renters, small beds, single soaker or drip line |
| Drip irrigation timer | Faucet plus drip tubing | 1 to 6 | $25 to $120 | Raised beds, containers, vegetable rows |
| In-ground controller | Hard-wired solenoid valves | 4 to 16+ | $60 to $300 | Whole-lawn buried sprinkler systems |
| Single-outlet unit | One faucet, one line | 1 | $15 to $40 | One zone that all runs on the same schedule |
A hose-bib tap timer screws onto a standard 3/4-inch spigot in under a minute and needs no wiring. An in-ground controller is a wall-mounted brain that never touches water itself; it triggers buried valves. If every plant can share one schedule, a single-outlet timer is enough. The moment your front lawn, back garden, and pots need different run times, you need multiple zones.
Irrigation timer types by power source
Power source affects reliability and mounting more than most buyers expect. Irrigation timers run on batteries, AC plug-in power, solar, or a manual windup dial. Battery models mount anywhere outdoors; AC models suit hard-wired in-ground systems; solar suits remote spigots with no outlet nearby; windup dials need no power at all but only run one cycle.
| Power source | How it powers up | Mounting | Watch-outs |
|---|---|---|---|
| Battery (AA or 9V) | 1 to 2 replaceable batteries | Outdoor, weatherproof housing | Dead battery leaves valve shut; swap yearly |
| AC / plug-in | Wall outlet or hard-wired transformer | Indoor or covered garage/wall | Needs an outlet within reach |
| Solar | Small panel charges internal cell | Outdoor, sun-exposed spigot | Weak output in shade or long overcast spells |
| Windup / mechanical dial | Spring, no electricity | Screws onto faucet | Manual start, single run, no repeat scheduling |
A windup mechanical timer is the cheapest safety net: you twist the dial to 60 minutes, walk away, and it shuts the water when the spring unwinds. It cannot repeat on its own, so it is a shutoff aid, not a true scheduler. Battery-powered digital timers are the default for most homeowners because they mount at any faucet without an electrician.
Indoor versus outdoor mounting
Indoor and outdoor rating is a hard constraint, not a preference. In-ground controllers often mount indoors (garage, basement, utility closet) and run low-voltage wire out to the valves. Hose-bib, drip, and solar timers live outside and must carry a weatherproof rating. Mounting an indoor-only controller outdoors voids most warranties and risks water damage.
If your timer body sits at the spigot exposed to rain and sun, confirm it is sold as outdoor-rated. If it hangs on a garage wall and only sends wires outside, an indoor unit is correct and usually cheaper.
How to choose the right irrigation timer for your setup
Match the timer to your plumbing first, then your schedule needs, then your budget. Renters and single-bed gardeners want a battery tap timer ($20 to $70). Mixed gardens with beds, pots, and rows want a multi-zone drip timer. Existing buried sprinkler systems need a wired in-ground controller. This ordering avoids the most common mistake: buying more zones than the yard can physically use.
- Count your independent watering areas. Lawn, vegetable beds, and containers each dry out at different rates. That count is your minimum zone number.
- Check the water connection. A faucet points you to a tap or drip timer. Buried valves point you to an in-ground controller.
- Decide automatic versus manual. Automatic timers repeat on a schedule while you travel. A manual or windup unit only runs when you start it.
- Add a rain-skip feature if you water a lawn. Skipping watering after rain is where most of the water savings come from.
For bed-and-container gardeners, a battery drip timer paired with tubing usually beats a full in-ground system on cost and flexibility. Our guides on the drip irrigation starter kit and drip irrigation for raised beds walk through pairing a timer with the right emitters.
Are WiFi and smart irrigation timers worth it?
A WiFi or smart irrigation timer connects to your home network and an app, letting you adjust schedules from your phone and, on better models, skip watering automatically using local weather data. They cost roughly $100 to $300 versus $25 to $70 for a comparable dumb timer. The premium pays off mainly for lawns and where water restrictions or high water bills apply.
| Feature | Smart timer | Standard timer |
|---|---|---|
| Phone control | Yes, from anywhere | At the unit only |
| Automatic rain skip | Weather-based, no sensor needed | Needs a wired rain sensor |
| Watering-restriction compliance | Set allowed days in app | Manual programming |
| Typical price | $100 to $300 | $25 to $70 |
Smart controllers from Rain Bird, Orbit B-hyve, and Rachio can pull local forecasts and cancel a cycle before rain. Some water utilities offer rebates that offset $50 to $100 of the cost. For a single drip line on containers, the extra spend rarely earns back; for a multi-zone lawn, it often does. Adoption trends are covered in our 2026 smart irrigation adoption report.
How to program an irrigation timer
Programming any irrigation timer comes down to setting three things per zone: when it starts, how long it runs, and how often it repeats. The dial or app labels differ by brand, but the sequence is the same. Set the clock first so start times fire correctly, then build each zone’s schedule.
- Set the current time and date so scheduled starts align with real clock time.
- Pick a start time per zone, ideally before sunrise (4 to 6 a.m.) to cut evaporation.
- Set run duration. Drip beds often need 20 to 40 minutes; spray lawn zones often need 10 to 20 minutes.
- Set frequency, such as every 2 or 3 days rather than daily, to encourage deeper roots.
- Confirm the mode is Auto, not Off or Manual, or the schedule will not run.
Save the manual, or a photo of it, in your phone. Most missed-cycle complaints trace back to a timer left in Manual or Off mode. For whole-system planning, see our overview of building a complete drip irrigation system.
Troubleshooting: timer runs but the valve won’t open
The most common irrigation timer failure is a timer that counts down normally while no water flows. That is almost never the timer itself; it is the valve, the wiring, or a sensor overriding the schedule. Work from the cheapest cause to the most involved before replacing any hardware.
- Check the battery. A weak battery can light the display yet lack power to hold the valve open. Replace it first.
- Confirm water is on. Verify the supply valve upstream of the timer is fully open.
- Inspect the rain sensor. A tripped or faulty rain sensor tells the controller to skip. Bypass it to test.
- Test the solenoid. On in-ground systems, a burnt solenoid or corroded wire nut stops the valve from opening. Check for 24 volts at the valve wires.
- Clear the valve. Grit under the diaphragm can jam it. Manually open the bleed screw to flush.
If manually opening the valve works but the scheduled cycle does not, the fault is in the signal path (battery, wiring, or sensor), not the plumbing. If the valve will not open even manually, the valve or solenoid needs service.
Major irrigation timer brands
Three brands dominate the shelves for home irrigation timers: Rain Bird, Orbit, and DripWorks. Rain Bird and Orbit both span cheap tap timers to smart multi-zone controllers, while DripWorks focuses on drip-specific timers and complete kits. Availability and warranty terms vary by retailer and region.
- Rain Bird: Wide range from hose-end timers to professional in-ground controllers; strong parts availability at major home centers.
- Orbit: Known for value tap timers and the app-based B-hyve smart line with weather-based rain skip.
- DripWorks: Drip-focused timers and matched kits aimed at gardeners running tubing and emitters rather than buried sprinklers.
Frequently Asked Questions
What is an irrigation timer and how does it work?
An irrigation timer is a controller that automatically opens and closes a water valve on a schedule you set. You program a start time, a run duration, and a frequency for each zone. When the start time arrives, the timer powers a valve open, water flows to your sprinklers or drip line, and it shuts off after the run time ends.
What is the difference between a hose faucet tap timer and an in-ground irrigation controller?
A hose-bib tap timer screws directly onto an outdoor faucet, contains its own valve, and runs on batteries with no wiring, costing $20 to $70. An in-ground controller mounts on a wall and never touches water; it sends 24-volt signals to separate buried solenoid valves. Tap timers suit beds and renters, while controllers run whole buried sprinkler systems.
Battery vs AC vs solar irrigation timer, which should I choose?
Choose battery for most faucet-mounted timers because they install anywhere without an outlet; replace the battery yearly. Choose AC plug-in for hard-wired in-ground controllers mounted near power. Choose solar only for remote spigots with strong sun and no nearby outlet. A weak or dead battery is a leading cause of a valve failing to open, so keep spares.
Are WiFi or smart irrigation timers worth it?
Smart timers cost $100 to $300 versus $25 to $70 for standard units. They earn the premium on multi-zone lawns and in areas with water restrictions or high water bills, mainly through automatic weather-based rain skipping and phone control. Some utilities offer rebates of $50 to $100. For a single drip line on containers, the extra cost rarely pays back.
How do I program or set an irrigation timer?
Set the current clock time first, then program each zone with a start time (4 to 6 a.m. is ideal), a run duration (20 to 40 minutes for drip, 10 to 20 for spray), and a frequency such as every 2 to 3 days. Finally, confirm the timer is in Auto mode. Timers left in Manual or Off are the top reason schedules never run.
How many zones or outlets do I actually need?
Count your independent watering areas: lawn, vegetable beds, and containers each dry out differently and should be separate zones. That count is your minimum. A single shared schedule needs only one outlet, while a mixed garden usually needs 2 to 6. Buying far more zones than your yard can physically use wastes money and adds programming complexity.
Why won’t my irrigation timer open the valve?
A timer that counts down while no water flows is usually a valve, wiring, or sensor problem, not the timer. Check the battery first, confirm the upstream water supply is open, and inspect for a tripped rain sensor. On in-ground systems, test for 24 volts at the solenoid and flush any grit under the valve diaphragm before replacing parts.
How much does an irrigation timer cost?
In 2026, single-outlet windup timers run $15 to $40, digital hose-bib and drip timers run $20 to $120, and hard-wired in-ground controllers run $60 to $300. WiFi smart controllers sit at the top, roughly $100 to $300. Prices vary by brand, zone count, and retailer, and some water utilities offer rebates on qualifying smart models.