By the HMNDP Editorial Team, independent reporting on lawn care, landscaping, soil, and the green industry.
Last reviewed: June 2026
What clay soil is, in one paragraph
Clay soil is soil made up of more than about 40% clay particles, the smallest mineral particles in soil at less than 0.002 mm across. Those tiny, flat particles pack tightly together, which is why clay holds water and nutrients well but drains slowly and compacts easily. It is not bad soil. It is dense, fertile soil that needs structure, not replacement.
Soil scientists sort mineral particles into three sizes: sand (0.05 to 2 mm), silt (0.002 to 0.05 mm), and clay (under 0.002 mm). A clay particle can be more than 1,000 times smaller than a sand grain. That size difference is the entire story: small particles mean small pore spaces, and small pores hold water by capillary action instead of letting it drain through.
Because clay particles carry a negative surface charge, they grip positively charged nutrients like calcium, magnesium, and potassium. This grip is measured as cation exchange capacity (CEC). For more on how particle mix defines every soil, see our overview of the main types of soil.
How to identify clay soil at home
You can confirm clay soil in your own yard in under 10 minutes with no equipment. The two fastest checks are the ribbon test and the ball test; the jar test gives you a rough percentage. Visible cracking in summer and standing puddles after rain are strong field signs. Run at least two checks before you decide.
The ribbon test (2 minutes)
Take a tablespoon of moist soil, add a little water, and knead it into a smooth paste. Press it between your thumb and forefinger and push it upward into a ribbon. Clay soil forms a ribbon longer than 2 inches (5 cm) before it breaks, and it feels sticky and smooth. Sandy soil will not ribbon at all and feels gritty.
The ball test (1 minute)
Squeeze a handful of damp soil into a ball. Clay holds a tight, shiny ball that keeps its shape when you poke it and can be molded like modeling clay. Loam crumbles when prodded. Sand will not form a ball at all. The more your soil behaves like putty, the higher its clay content.
The jar (sedimentation) test (overnight)
Fill a clear straight-sided jar one-third with soil, top up with water, add a teaspoon of dish soap, shake hard for two minutes, and let it settle for 24 to 48 hours. Sand drops in minutes, silt in hours, clay over a day or two. Measure each layer. If the top clay layer is more than 40% of the total, you have clay soil.
Field signs you can read without a test
- Puddling: water sits on the surface for hours or days after rain instead of soaking in.
- Cracking: the surface splits into hard polygon plates as it dries in summer.
- Sticking: wet soil clings to boots and tools in heavy clods.
- Hardpan: the ground turns brick-hard and resists a shovel by midsummer.
The real pros and cons of clay soil
Clay soil’s strengths and weaknesses come from the same trait: tightly packed fine particles. That packing makes clay the most nutrient-rich and moisture-retentive common soil, and also the slowest-draining, slowest-warming, and hardest to dig. The table below compares the trade-offs so you know what you are working with.
| Trait | Clay soil behavior | What it means for you |
|---|---|---|
| Nutrient holding (CEC) | High, often 25 to 50+ meq/100g | Fewer fertilizer applications needed |
| Water retention | High | Survives drought; risks waterlogging |
| Drainage | Slow | Roots can drown; pick a fix below |
| Spring warm-up | Slow (cold and wet) | Plant 1 to 2 weeks later than sandy soil |
| Compaction risk | High | Never walk or dig it wet |
| Workability | Hard when dry, sticky when wet | Narrow window to dig |
Stop treating clay soil as the enemy
Clay soil is fertile, not defective. The negative charge on clay particles is exactly what holds the calcium, potassium, and magnesium your plants need, which is why many of the most productive farm soils on Earth are clay-rich. The goal is never to remove clay. It is to build structure so air, water, and roots move through it.
Structure means getting individual particles to clump into crumbs (aggregates) with pore spaces between them. Organic matter and soil life do that. Once a clay soil is well structured, it keeps clay’s fertility and water-holding while gaining the drainage and tilth of good loam. That outcome is realistic; it just takes seasons, not a weekend.
The primary fix: organic matter (with real numbers)
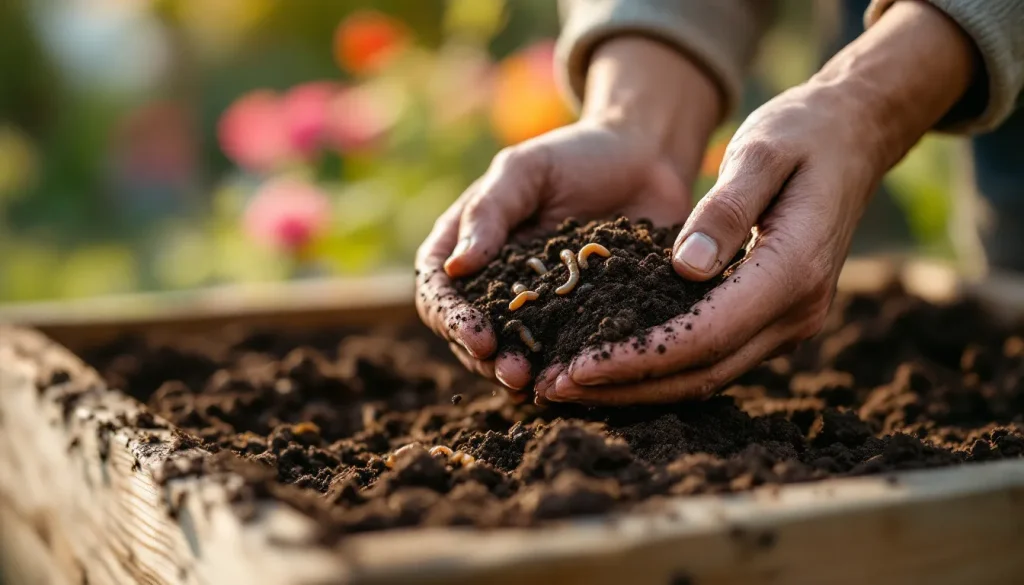
Organic matter is the proven way to improve clay soil. Compost, leaf mold, and aged manure feed the microbes, fungi, and earthworms that bind clay particles into crumbs. The usual advice stops at “add compost.” Here is the quantity, depth, and frequency competitors leave out, plus a season-by-season timeline.
How much, how deep, how often
- First year, establishing a bed: apply a 2 to 3 inch (5 to 7.5 cm) layer of compost across the whole bed. That is roughly 1 cubic yard per 100 square feet at 3 inches deep.
- Maintenance, every year after: add a 1 to 2 inch (2.5 to 5 cm) top layer each spring or fall.
- Target organic matter: aim to raise soil organic matter toward 5%, measured by a soil test.
- Best materials: finished compost, leaf mold, and well-aged manure (composted at least 6 months). Avoid fresh manure and fresh wood chips dug into the soil.
A realistic season-by-season timeline
| Time | Action | What you will notice |
|---|---|---|
| Season 1 (year 1) | 2 to 3 in compost on top, mulch over it | Easier surface digging; little drainage change yet |
| Season 2 to 3 | 1 to 2 in compost added each year | Earthworms increase; top few inches crumble |
| Year 2 to 3 | Keep mulching; minimal digging | Noticeable drainage and root depth improvement |
| Year 3 to 5 | Annual top-up only | Loam-like tilth in the worked zone |
Improving clay soil is a 2 to 5 year project, not a one-season fix. Anyone promising instant results is selling something. For the broader fundamentals behind feeding soil life, see our guide to building healthy garden soil.
Why you should not add sand to clay soil
Adding a bag of sand to clay soil is the most common, most damaging mistake. In small amounts, sand grains fill the gaps between clay particles and create something close to concrete. To actually loosen clay with sand you would need roughly 50% or more sand by volume, which for a typical bed means moving tons of material. It is not practical, so skip sand entirely.
The reason is geometry. A little sand in a lot of clay just gives the clay solid points to pack around, reducing pore space instead of adding it. The mix that masons use for hard mortar is, broadly, sand plus a fine binder. You do not want garden beds behaving like mortar.
If sand was already added: do not try to dig it back out. Pivot to organic matter. Layer 2 to 3 inches of compost on top each season and let soil life rebuild structure around the sand. The fix is the same as for any clay; sand just makes the starting point a little denser.
The gypsum debate, resolved in one rule
Gypsum (calcium sulfate) only improves clay drainage when the soil is sodic, meaning it has a high sodium content that makes clay particles disperse. Sodic soils occur mainly in arid regions and some coastal or irrigated areas. The vast majority of home garden clay is not sodic, so for most readers gypsum does nothing for structure. Test before you spend.
The decision rule: get a soil test that reports sodium or exchangeable sodium percentage (ESP). If ESP is above about 6 to 15%, your soil is sodic and gypsum can genuinely help by swapping calcium for sodium. If it is not sodic (most cases), spend that money on compost instead. Many state university extension services offer mail-in soil tests for $15 to $30.
The lowest-effort path: no-dig (no-till)
No-dig is the easiest evidence-backed method to improve clay soil, and for most home gardeners it beats tilling. You lay compost and mulch on the surface and let earthworms and roots pull the organic matter down and build channels. It avoids the compaction and structure damage that repeated tilling causes in clay. Less work, better long-term result.
- Clear or flatten weeds; no need to dig them out.
- Add a cardboard or thick paper layer (optional) to smother weeds.
- Spread 2 to 3 inches of compost on top across the whole bed.
- Top with 2 to 3 inches of mulch (wood chips, straw, or shredded leaves).
- Plant directly into the compost layer and add a fresh inch or two each year.
Tilling clay can feel productive, but turning wet clay shatters the crumb structure you are trying to build and can create a compacted “plow pan” below the blade. If you must loosen deeply, use a broadfork to crack the soil without inverting it.
Improving drainage when you cannot wait years
If you need a planting area this season, build up instead of digging down. Raised beds, mounded berms, and surface mulch layering all let you grow above the slow-draining clay while the clay below slowly improves. These are the fastest reliable ways to beat clay drainage without large earthworks.
- Raised beds: 8 to 12 inches of quality soil over the clay gives roots a free-draining zone immediately. The clay still benefits from the organic matter above it over time.
- Berms and mounds: shaped soil mounds raise the root crown above standing water; useful for shrubs and perennials.
- Mulch layering: a permanent 2 to 3 inch mulch cover keeps clay from cracking and crusting and feeds the soil from the top down.
When to amend and when to leave clay alone
Not all clay needs fixing. If you are planting clay-loving natives, established trees, or a low-traffic area, leaving the soil undisturbed is often the best choice. Amend the zones where you grow vegetables, annuals, or fussy ornamentals, and leave the rest to native plants adapted to it. Match the effort to the plant.
Two timing rules protect clay no matter what you plant. First, never dig, walk on, or work clay when it is wet, because pressure on wet clay smears the particles and causes lasting compaction. Wait until a handful crumbles instead of smearing. Second, keep it covered with living plants or mulch so it never dries to brick.
Plants that thrive in clay soil
Many plants grow well in clay because they tolerate heavy, moisture-holding ground. Choosing clay-adapted species saves you years of amending. Below are reliable performers across common categories; check that each suits your hardiness zone and light before planting.
| Category | Clay-tolerant choices |
|---|---|
| Perennials | Black-eyed Susan, coneflower (Echinacea), daylily, aster, bee balm |
| Shrubs | Hydrangea, viburnum, red twig dogwood, ninebark |
| Trees | River birch, bald cypress, swamp white oak, hawthorn |
| Grasses and groundcover | Switchgrass, big bluestem, ajuga, creeping juniper |
| Vegetables (in amended beds) | Brassicas, beans, squash, leafy greens |
Before choosing plants, it helps to know your soil’s acidity, since clay can be acidic or alkaline depending on region. Our walkthrough on how to test soil pH shows the quick methods. You can find more growing guides on the HMNDP learn hub.
Frequently Asked Questions
Is clay soil good or bad for plants?
Clay soil is good in many ways and bad in a few. It holds nutrients and water better than any other common soil, so plants rarely starve or dry out. Its downsides are slow drainage, slow spring warming, and easy compaction, which can drown or stunt roots. With organic matter and the right plants, clay becomes highly productive.
How do I know if I have clay soil?
Run the ribbon test: knead moist soil and push it into a ribbon between your fingers. Clay forms a sticky ribbon over 2 inches long. Confirm with the jar test: shake soil and water in a jar, let it settle 24 to 48 hours, and measure layers. If the clay layer is more than 40% of the total, you have clay soil.
What is the fastest way to improve clay soil?
The fastest reliable fix is building up, not breaking down. Lay 2 to 3 inches of compost and 2 to 3 inches of mulch on the surface, or build an 8 to 12 inch raised bed for an instant free-draining root zone. For the clay itself, expect 2 to 5 years of annual compost top-ups before drainage changes meaningfully.
Should I add sand to clay soil?
No. Small amounts of sand fill the gaps between clay particles and create a dense, concrete-like soil. To loosen clay with sand you would need about 50% or more sand by volume, which is impractical for any normal bed. Use compost and other organic matter instead. If sand was already added, stop and switch to compost on top.
Does gypsum actually break up clay soil?
Only on sodic (high-sodium) clay. Gypsum works by replacing sodium with calcium so clay particles can clump and drain. Most home garden clay is not sodic, so gypsum does nothing for structure there. Get a soil test reporting sodium or ESP first. If ESP is above roughly 6 to 15%, gypsum helps; otherwise spend on compost.
How long does it take to improve clay soil?
Plan on 2 to 5 years. In season one you will dig the surface more easily but see little drainage change. By years two and three, earthworms multiply and the top few inches crumble. By years three to five, with 1 to 2 inches of compost added annually, the worked zone takes on a loam-like texture and drains noticeably better.
Can I just build raised beds instead of amending my clay soil?
Yes, and it is often the smartest move. An 8 to 12 inch raised bed filled with quality soil gives roots a free-draining zone this season, with no waiting. The clay below still improves over time as organic matter migrates down. Raised beds are ideal for vegetables and fussy plants where you cannot wait years for native clay to change.
Why does my clay soil crack and turn rock-hard in summer?
Clay particles are tiny and flat, so when water leaves them in dry heat they shrink and pull apart, splitting the surface into hard plates. The same tight packing that holds water makes dry clay set like brick. A permanent 2 to 3 inch mulch layer keeps moisture steady, stops cracking, and prevents the surface crust that sheds rain.